Thursday, July 30, 2015

Pina Colada Triffle

My husband loves to cook and for years complained that, although he got lots of complements, none of his co-workers believed he actually made his potluck offerings. Thankfully that changed when he switched to his current job about 2 years ago. He constantly has people asking for his recipes. The funny part is that he loves to experiment and usually can't remember exact measurements.


He is know for making delicious trifle style desserts and today I'm going to share how he makes them. If you scroll down a bit you'll see how we made a Pina Colada Trifle for his potluck at work today but first I want to talk a bit about choosing flavors. Even though the trifles we make follow a basic formula there is still a lot of experimentation with the flavors; you'll be able to use the method below to make a variety of desserts. Basically you need to choose 3 flavors: a cake flavor, a pudding flavor, and a fruit/ topping flavor. For example we made a trifle for Thanksgiving once that used spice cake, pumpkin pie pudding, and oatmeal nut crumble topping. Another example used homemade chocolate sour cream cake, cheesecake flavored pudding, and cherry topping.

Moving on to the recipe you have the same three components listed above and the assembly. Pictured below is everything you need to make our Pina Colada Trifle.


Step One: Cake


This can be as simple or complicated as you want it to be. Generally we use boxed cake mix but you could make it from scratch or even buy a premade angel food cake from the grocery store bakery. For this particular trifle we used white cake mix but replaced the water called for with the juice from two cans of crushed pineapple and a bit of coconut rum.


Step Two: Pudding


To make the pudding layer you need a box of instant pudding mix, a package of cream cheese, and a tub of whipped topping. Whip the pudding mix and cream cheese together using either a hand mixer or a stand mixer. Add a little bit of milk if needed to make it nice and fluffy. Then fold in half of the whipped topping with a spatula. This recipe used coconut cream pudding.


Step Three: Topping


This will vary depending on what flavors you decided to go with. Mostly we have used fruit topping but we've also used nut and oat streusel, caramel sauce, and hot fudge. Fruit topping can be fresh fruit, fruit that you cook down so it has a little syrup, or even just canned pie filling. This trifle uses canned crushed pineapple.


Step Four: Assembly


To assemble your dessert just layer everything. We are very lucky to have round cake pans that fit into our trifle dish with minimum trimming. If you aren't as fortunate just cut the cake into squares and create a layer of cubes on the bottom layer. Top that off with half the pudding and then half the fruit. Repeat all the layers and finish with the remaining whipped topping and garnish as desired. We topped this with both regular and toasted coconut.


Monday, July 27, 2015

Bleach Dyed Serenity Shirt

If you look at any kind of crafty or Do it yourself websites you have probably come across bleach dyed t-shirts. The basic idea is to use a dark colored shirt and create a design using bleach to lighten the shirt instead of dye to darken a light shirt. It's a pretty simple process and one that I've been meaning to try for a while.


The first thing that you need to do is decide what kind of a design you want. If you do a quick internet search you will find all kinds of ideas but from what I've seen there are three basic types. The most common uses a stencil and sprays bleach around the design so it remains black but the area behind it is bleached out. (My design is a variation of this.) The second is using a brush or bleach pen to paint a more detailed design. The last style I've seen uses bleach to create tie dye type designs.


Materials:
Dark Colored T-shirt
Bleach
Paintbrush/ Spray bottle to apply bleach
Cardboard to slide inside shirt

Optional Materials:
Freezer Paper for making stencils
Iron and ironing board
Fabric Paint

Step One: To make a stencil using freezer paper all you need to do is transfer the design to the paper side and cut it out. I used a silhouette of the Serenity from Firefly to make a shirt for my husband. I actually used both the positive and negative part of the stencil so hang on to the outside after it's cut.
Step Two: Wash and Iron shirt so the front is smooth. (I actually skipped the washing and for the most part it was fine. It did cause a small issue with the design that I'll show later.)

Step Three: Decide where you want your design and iron the stencil to the shirt. Just place it with the waxy side down and hold the iron over the design for about 20 seconds.


Step Four: Put a layer of cardboard inside the side to keep the bleach from soaking through to the back. Apply Bleach using either a brush or spray bottle.


I kept things pretty simple since this was my first attempt but I get the impression from other designs I've seen that you can go back and add layers to create lighter areas. I used a fairly large brush but in retrospect I kind of wish I had tried a smaller one because I think it might have let the brush strokes show and created slightly more variation in color.

Step Five: Let the design sit for a few minutes to give the bleach a chance to work, then rinse to stop the reaction.

Other tutorials I looked at listed anywhere from 10 minutes to an hour. Just keep an eye on it so you can see when the color reaches a place you like. If you leave it to long it will totally bleach and turn the shirt white. When you are happy with the look wash the shirt in cool water to remove the bleach. Just a quick rinse in the sink should be enough but I washed this one in the machine with some old towels just in case the bleach spread.

Depending on your design you could stop there but I wanted to add a second layer using fabric paint.

Step Six: Iron on the other part of the stencil trying to line it up as best you can with the bleached line.


You can see here that because I didn't wash the shirt first everything shrunk a bit and it was impossible for me to line things up right but I did my best.

Step Seven: Fill in stencil with fabric paint. I used Tulip Soft Fabric Paint in Platinum.


Step Eight: Remove the stencil and check out your final design.


Thursday, July 23, 2015

Mansion Map

This week I am working on a few different projects for my husband's Pathfinder game. The main thing is mapping out a mansion for his next adventure. There are three floors and a basement but right now I'm focusing on the main floor and basement. I know that some of the players for that game read my blog so I don't want to give too much away. I will be drawing out the others floors as well but they are less likely to be needed. If I can finish it in time I plan to add a little bit of color. You can't see it in this picture but there is a courtyard that I'd like to fill in maybe with watercolor.

Entry and Front Stairs
I've mentioned before that they are not using a grid for most battles so I also worked on making sticks to help measure movement. Using leftover dowels from our Pi Day invitation I marked off one inch increments and filled every other space using acrylic craft paint. I had previously tried just coloring them with Sharpie markers and while it worked alright the paint looks much nicer and is much easier to see. I will probably add an extra coat of paint later but one seems to be enough to do the job. If you wanted you could use colors to somehow represent each character, like use the colors of a knightly order but I just chose red because it created the best contrast with the color of the wood.


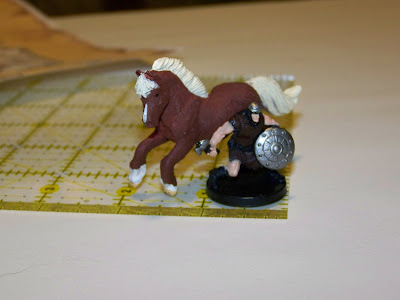
The final I'm working on is horses for the party. A while back I came across a post through Pinterest talking about Dollar Store items for use in games. One of the things it mentions is using small toy horses to represent the players when they are on horseback. I've never been able to find any at the dollar stores around us but I got lucky and found two of these tubes on clearance at the store where work.


When you set them next to a regular mini they seem a little big but they only take up two squares on a game mat so they are actually about the right scale. We just need to find some kind of base to glue them on so that they are a bit more stable. There were eight horses in each pack so we have sixteen which makes enough for the party plus ten extras for villains or other npcs.


Monday, July 20, 2015

Zoo Trip and Quilt Creatures

We are starting in on the final day of our three day celebration of my husband's birthday. Saturday stayed very low key. We needed to take Curry to the vet to get some of his kitten shots around 11:30 so we slept late, went to the vet, then cooked lunch at home. In the afternoon we did a little bit of shopping and also ran some errands to help keep the rest of the weekend clear. I also spent a little time working on the animal designs for my woodland quilt. The pictures below show the animal from my fabrics on the left hand side, my drawing in the center, and a reference for the character on the left. (In the case of the raccoon I show the nerf gun I used as a reference to make Marvel's Rocket Raccoon.)

Legend of Zelda Owl

Rocket Racoon

Sonic the Hedgehog
Starfox
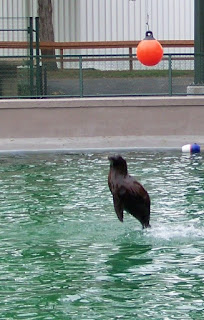
Yesterday we headed out to the Kansas City Zoo and had a fantastic time. We decided that we would try to catch some of the shows and talks during this visit, starting with the sea lion show. We also saw the Wings of Wonder Bird Show, a zoo keeper talk at the gorilla exhibit, and elephant baths. The weather was much cooler and cloudier than we expected and it worked to our advantage. The threat of rain kept the crowds low and also cut down on some the reflection problems I've been having trying to take pictures. Also some of animals were more active due to the cooler weather, between that and the keeper talks we were able to get some really nice pictures.


Leaping                                     Giving a High Five


The elephants enjoyed the chance to get all the caked on mud washed off and getting to drink straight from the hose. 


My husband had his step counter on and we walked almost 8,500 steps during our visit! As we were leaving we happened to catch a couple of keepers having a training session with the River Otters which was very cute. This is where I got my favorite picture of the day, this otter with her tongue sticking out.

 I wonder if they have an otter show in the works? I would definitely want to see that. I took a lot of pictures and if you'd like to see more of our visit you can check them out on the facebook page.

Thursday, July 16, 2015

My Favorite Webcomics

This week has been a little busy. All of our cats are sick and sneezing. We hope that they just have a cold and will be able to get over it soon. Curry has an appointment with the vet this Saturday to get the last of his shots so we'll see what we can find out. The other thing that's been distracting me is the fact that my husband's birthday is coming up this weekend so we have been trying to make plans for that. We really aren't doing anything special but we have a three day weekend together so we can go out and do some stuff but still have time to just hang out and do nothing together. I am still working on my quilt plan but it may be a while before I have enough done to give a proper update.

My stash of library book inspiration
In the meantime I thought that I'd share some of my favorite comics to read online. Here's my top 4.

Number 4: The Gamercat

Gamercat is an adorable comic about a cat who loves video games. There's also a cast of supporting characters including a kitten named Glitch who is a little bit like a little brother.


Number Three: Breaking Cat News


Breaking Cat news is about a trio of cats that report on all the news in the cat world. If you have cats you'll recognize a lot of things from their news stories. The cats are based on the artists cats and each have their own distinct personalities and quirks. The panel below is from one of my favorites, my cats always make sure my toes are roasty when I'm sick.


Number Two: Atomic Robo

Atomic Robo is about a robot built by Nikola Tesla. Robo is sentient and runs a modern scientific research company called Tesladyne. The jumps around in time and covers a wide variety of stuff from Robo fighting in World War II to modern day battles against his nemesis, Dr. Dinosaur.


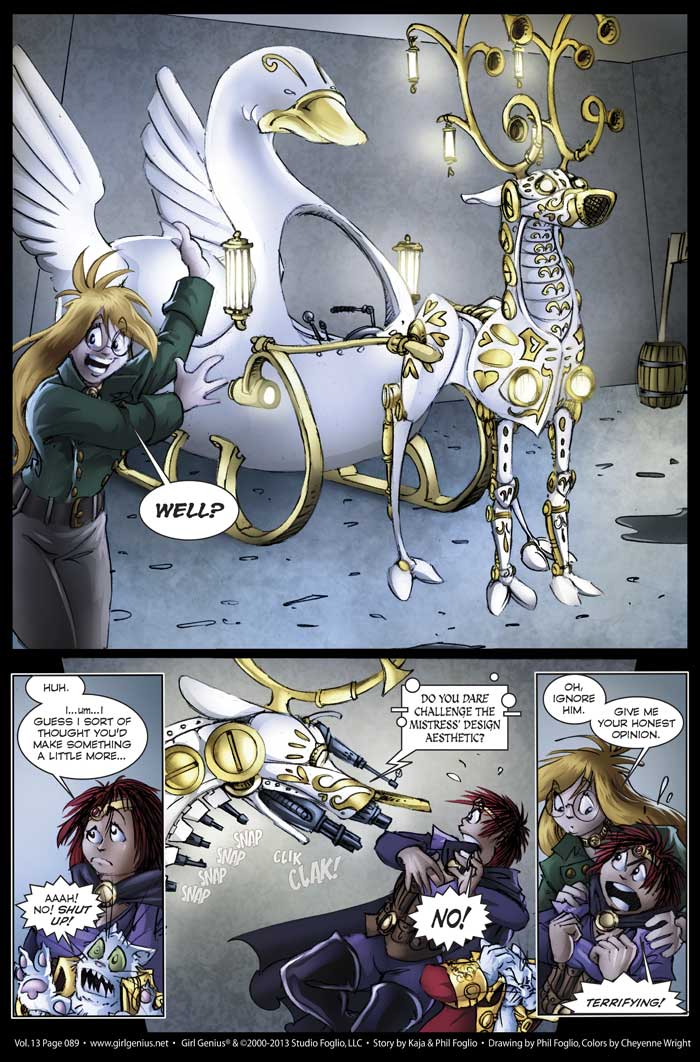
Number One: Girl Genius


Girl Genius is the most difficult comic on this list to describe but also my favorite. Its basically about steampunk mad scientists but much more complicated and awesome. This comic has a little bit of everything...action, adventure, romance, science, clanks (robots), various monsters (Jagers), and recently talking bears (which I think are awesome), a talking castle, the king of all cats, and an evil talking train... I could keep going with this list but you get the idea. Girl Genius is also the source of some of my favorite quotations such as "Any plan where you lose your hat... is a bad plan." and this one from the novelization of the comic, "People keep giving me rings,"she confided to him, "But I think a small death ray might be more practical."


Monday, July 13, 2015

Lego At Powell Gardens

Yesterday morning we headed out for Powell Gardens pretty early in the morning. It's about an hours drive from where we live and we wanted to get there before it got to hot and muggy. We specifically went to see the Nature Connects Lego sculptures but we also wandered around the garden in general. The sculptures are arranged to form 14 scenes created by artist Sean Kenney and are on display until September 7.


We don't get out to the garden often because it's such a long drive but we always spend most of our time at the Island Garden when we do. I love taking pictures of waterlilies and my husband likes to listen to the sound of the waterfall.


When I stepped forward to get a close-up of these little ducklings I noticed something hiding in one of the nearby lilies.


We usually don't take the time to climb up the Silo Overlook but we decided it might be nice to go up and enjoy a little bit of breeze yesterday. The Quilt Garden had grown up quite a bit since the last time I looked down on it. It's pretty impressive.


By the time we hit all the Lego scenes it was getting very hot and we were ready to head home and have some lunch. To see more pictures of our visit stop by Eclectic Otter's facebook page.


Thursday, July 9, 2015

Over Planning-Woodland Quilt Pt 3

Some of you might remember a previous post where I mentioned that one of the things that keeps me from completing projects is a tendency to over plan.

This project is a prime example of this. I spent the week scanning pinterest for interesting looking quilt squares and requested 6 different quilting books from the library. (Only 2 of those have come in. The rest are checked out so I have to wait.) I found a whole slew of blocks that I like but since I've never made a quilt before I think that I ought to stick to patterns that are somewhat simple.

I started to layout my pattern by using graph paper to mark off a rectangle 30 x 36 squares. Each square represents a 2 inch by 2 inch area of the quilt. Then I marked off where I thought I would place each of the embroidery designs I'm planning to have and colored them pink.


You can see where I started to fill in the remaining squares with quilt block patterns. Before I got very far into it I decided it would be good to make a reference page for some of the blocks I liked. So I divided another sheet of graph paper into 12 x 12 squares and started sketching in designs from the books I have. I used colored pencils to fill in the various colors just to show the design, they don't really correspond to any particular fabric at this point.


The only thing left to do is to is place them into the empty spaces in the bigger template. I tried to stick to fairly simple blocks but some of these, like those numbered 14 and 17 above, are probably a little complex for me. Although I may try one and see. I could always replace it with a plain block if it didn't turn out right. The other thing I need to consider is the scale for the fabrics I have. The animals are fairly small but I don't want them to be cut into such small pieces that you can't tell what the pattern was.

However I won't be getting much work done over done the weekend. This weekend is reciprocal weekend between the Kansas City Zoo and Powell Gardens, which means we can use our Friends of the Zoo pass to enter Powell Gardens for half-price.

I like the way the plants grew up to enhance some of the sculptures.

We've been meaning to go because they currently have a Lego Exhibit at the garden. We went to the original Nature Connects Exhibit in 2013 and are excited to see all new Lego sculptures.

Blending of real and Lego waterlilies