Thursday, December 28, 2017

Christmas Wishes and the Ever Growing Craft List

Every time I decorate our tree at Christmas time I think about other ideas I have for crafting decorations.

I have ideas for three different wreaths that I want to make. Our front door already has one that I made back in college but the hallway would be super festive with each bedroom door decorated.

The first wreath is really just a vague idea. I found this sign a while back and had the idea to use it as part of a wreath. Maybe make a small box or coal to go with it, or kryptonite, I don't really know. Gold ornaments would add to the Christmas color but also tie in with the heroes outfits.


The second wreath that I wanted to make was this Hobbit-inspired wreath. I actually saw a version someone made with tiny lanterns on the side and it was the cutest thing ever. There are instructions at the link under the photo.


The final wreath that I want to make is this wonderful Lego style wreath. We have a large peak on our front roof and I've always wanted to fill it with a gigantic wreath. After buying our own 3D printer earlier this year I found this a file to make Lego branches on Thingiverse.com. I bet if I print enough of them I could fill that space right up, I just need a spool of the filament and some time. I could probably even figure out how to add some lights.


I probably own enough ornaments to decorate three trees as well but am always on the lookout for new ones to buy or make. This Christmas, I didn't find anything I liked well enough to buy, outside of our traditional yearly ornament that is. Every year since our wedding my husband and I have purchased an ornament for the tree that we think somehow represents the year. This year's is from our 10-year anniversary vacation in Colorado.


But, I was somehow reminded of an idea I had years ago to make origami ornaments using fabric. I envisioned an entire origami tree but never worked on it because I'm stuck on a detail about how to finish the fabric. The basic idea is simple enough, use fabric and an iron to fold origami models, add a loop of thread or ribbon to hang from, and maybe starch to help them hold the shape. Some origami things use the plain white back of the paper to enhance the design, like this penguin.


 I figured you could use Stitch Witchery or something to fuse plain muslin to a solid colored cotton to make more traditional 'paper'. My problem is, how do you finish the edges to prevent raveling? My best idea so far is to maybe use a line of Fray Check all around but that seems potentially time consuming and expensive. You could stitch around the edge or add a tiny hem but then you'd have extra bulk on the edges of the square and I'm not sure how it would affect folding.


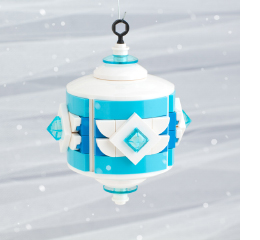
The other thing that would be amazing is an all-Lego tree. Not only are there ornament kits from the Lego company every year but there is also an amazing blog that puts out plans for Christmas ornaments each year. You can see this year's designs by following the link below.


Among many other decorations and things that I saw this month I really liked this sign. The main portion is printed on and the words in the center are die cut from metal and slightly raised up. I thought that I might be able to make my own custom hand painted version sometime. Now to decide what words or phrase to use...


Finally, I've been kind of disappointed this year that we didn't have any festive holiday clothes. Maybe sometime before next Christmas, s I can fix that. I don't have a plan in mind though, other than perhaps a nice bandana or bow tie for Gil to wear.

I've also added a few non-Christmas projects to the list. Last winter both my husband and I needed new coats. We chose matching ones that remind us of Han Solo's coat from Hoth. They have a patch on the sleeve that we intended to cover with the Rebel emblem but I forgot all about it until we got them out again this year.


I also purchased a few yards of two licensed fabric from work to make simple skirts and a few yards of Star Wars fabric. The Star Wars fabric coordinates with a knit I purchased some time ago but have never sewn with it because I don't know much about sewing with knits. It's great fabric and I'd love to learn to use it. I bought the cotton coordinate without a clear plan to use it because I knew if I waited it would sell out and I'd never see it again.


Hope you all have had a lovely Christmas and enjoy the New Year!

Wednesday, October 18, 2017

Our Newest Toy

We are the proud owners of a new 3d printer and I am super duper excited!

We have been thinking about getting a 3d printer of our own for some time now. We loved using the Makerspace at the library but it gets hard to print everything you want when you have to schedule a time in advance. Plus, the two hour time frame limits the what you can print and the quality you can print pretty quickly. We decided to buy an Anet A8 because it was cheap. We are well aware that with it being the low price option it may not be the best quality. We're thinking of it as an entry-level machine to test the waters and see how much we really even print on our own. If we use it a lot but find ourselves wishing we had more features or better quality then we'll upgrade but if not we haven't spent a ton on something we won't use.


Of course, it was a kit so we had to assemble everything ourselves. It actually went more smoothly than I expected. For one thing, my husband and I aren't great at building things together. I can't really put my finger on why but we irritate each other when we try it. The second thing that concerned me was that we both have a lack of experience with this particular sort of thing. However, after looking at some reviews and build videos I was fairly certain we could handle it.

We placed the order and everything arrived the Thursday before my birthday. We kicked my birthday off with brunch then came home and got started with the assembly. It took me most of the afternoon. Bear sat with me, and consulted when I had questions but mostly let me work alone. Around 5pm we turned everything on and it actually worked!

Well....turned on at least.

It was time to level the bed and do a test print. Once we loaded the file and hit print, nothing happened. The nozzle was preheated before we added filament, the screen had switched over to say it was printing, but nothing moved. After we waited for almost half an hour with no change we gave up, turned everything off and went to dinner. I did notice that the bed never heated up, it sat at 0 of 60 degrees the whole time.

Thus began my process of getting to know our 3d printer and learn how to use it. Nothing has made me feel as smart and simultaneously so dumb at the same time. Smart, because I built a complicated thing and it worked. Dumb, when I finally figured out that the only reason it wouldn't print was a loose connection. I am glad that I figured it out but the amount of time wasted fiddling with things for such a simple fix was a bit frustrating. Oh, but the excitement when it did start printing that test file.

And so, I printed a box. The corners are little off but after careful inspection, we think it has to do with the bed not being quite level.


Loading the filament is a little tricky and the button you have to hold down is not comfortable. For watching videos prior to the printers arrival, we knew we could print a replacement so that was high on our list. Problem was, we'd used the filament that came with the printer for the test run so we needed to change it before printing again. This is where we started to have real problems....  We had so much trouble trying to load the new filament that we finally ended up taking the fan parts off so we could see better, loading the filament, and putting things back together. It is not something I recommend, especially since the nozzle has to be hot to load filament. (There are several parts you can print that basically put a hinge here. I am looking into that but it seems that most of them alter the way the heat sink and fan connect so thing may not cool quite right. I don't want to rush into anything like that.)

After that, I decided to move the printer. We built it on the dining room table without really thinking it trough and I needed the table to cut our a sewing pattern. So the printer got picked up and moved to our living room hightop table. I knew since I moved it I should check the bed again to be sure it was level. However, there was one corner that was obviously too high but impossible to tighten down any further. Just sending the printer to the home position tore the tape on the bed.

It's kind of hard to see here but if you look right in the shadow you can see where the nozzle drug along the bed.
After various fruitless attempts, I decided to start completely over. To level the bed you start by adjusting the limit switch and the fine tune the level using wing nuts under each corner of the bed. Prior to this I' just been trying to tighten the wingnuts. It turns out that moving it caused the limit switch to slip down so the entire bracket holding the nozzle was lower than it should have been. After fixing that everything leveled fairly quickly and it was time to try printing that button.

What I ended up with looked like this...


I stopped the print about 10 percent in because it was obvious something wasn't right. I had watched it a bit and it seemed like the temperature of the hot end fluctuated a LOT. Since I had the previous problem with a loose connection for the bed I checked this first. This particular cord was one that seemed stretched a bit too tight when we'd wrapped all the cords so I loosened the wrap a bit and tightened where it connects to the main board. 

But the second attempt looked like this...


At first, it seemed to be doing better but as it got further in things went crazy. While it was set to print at 220 degrees it varied all the way down to 135. After a bit of research, we finally figured out the problem. Turns out the hot end cord has a small bit called a thermistor that fits into a hole next to the extruder. When we took everything apart to help load filament, we didn't get it back properly.

That small white wire is the thermistor.

When we tried for the third time, we finally got a button. The top is a bit rough but still WAY more comfortable than the screw that functions as the button before.


Now that we have everything working relatively well we've tried printing more thing with varying degrees of success. 

This orange peeler worked out pretty well.


This DnD figure? Not so much.


We are continuing to experiment and learn more about our printer and 3d printing in general. We have a hunch that this guy was printed with too high a heat setting so we'll make some adjustments and try again soon. There are also various upgrades to help with the safety and accuracy of the printer so we will most likely make some adjustments. We've already run it through a power strip with a switch so we can turn the power off without unplugging it but I found a tutorial for adding a real switch to the power supply. Once I can get the parts ordered I think that's at the top of the upgrades lists.

There are so many things we can print everything from minis for DnD, to cat toys, to small kitchen gadgets and everything in between. Bear is looking forward to printing dungeon tiles and terrain for games and I have ideas all over the place. I spent this afternoon looking at Christmas ornaments and tree toppers. Should we have a D20 topper? A light up star? Or maybe the triforce? 

What should we print now?

Sunday, September 10, 2017

Eclipse Watching, Books, and Crazy Things

It's been almost 3 weeks since the big solar eclipse and I am finally getting around to posting the few pictures and things I have. We had stormy weather here so the actual event was a bit disappointing but we had a good time going out anyway. We packed an umbrella and some dry clothes in case of rain plus a small picnic lunch and headed out to Weston Bend State Park. We live directly in the path of the eclipse but driving slightly north but us in the path of totality. There were all kind of articles out beforehand with tips involving avoiding traffic and such so we planned to leave super early in the morning.


This was the weather when we left the house around 7:30. Not great but not completely overcast either. We had absolutely no trouble with traffic getting there.  My initial plan was to park near one of the hiking trails and head down near the shore of the river so we'd been in a more open area but when we got there the parking was full. We would have had to walk way too far, carrying way too much stuff especially given the high potential of rain. We eventually set up at the scenic overlook. Tiny Wonder Woman joined us on the adventure and helped to record data for NASA research using the Globe Observer App. You can read more about it here.


We did get some rain but sheltered by the trees it wasn't too bad. At the very beginning of the eclipse, it was still only partly cloudy and we could see little glimpses of the sun through the clouds. Unfortunately, as it got closer to the totality it got cloudier so we weren't able to see the sun at all at that point. We did get to see it get darker as the shadow came across the river and that was neat. Here's some video of the event. It is actually two videos that I stitched together and speed up to double speed. The first part shows how dark it got and the second shows it getting lighter out.


This is what the sky looked like as we were leaving, very pretty and misty but it does not bode well for us.


It started raining before we got even 10 minutes down the road on the way home. It took us about twice as long to get home as it did to get there. It was mostly due to weather although we did hit a small bit traffic, that was only maybe 10 minutes of slow down. The bigger problem was the issues with our foundation that I mentioned a few posts back. Because there has been so much rain and flooding in the area we aren't able to get anyone out to look at it until the end of September. There were several waves of storms that hit the area that Monday and we had a mess on our hands. We ended up needing to clean everything out of two closets in our house and have pulled the carpet in our guest room to stop mold from growing. Luckily most of our things actually came out alright. I did have some fabrics that bleed but they seem to have come clean with the help of some oxygen bleach.


We have been busy trying to get everything cleaned up and ready for repairs. We are also in the process of decluttering the house for a variety of reason, not the least of which is that we currently have no place to store the things we moved from our guest room since they can't go back in until we manage to get repairs completed. We never intended to stay in this house forever and the recent problems with the flooding we are considering moving up that timeline. Even so, repairs still have to be made regardless. In addition to all of this, we had previously decided to move forward with infertility plans and that has resulted in my having doctors appointments about every day off that I get. Overall it's a bit overwhelming and I don't think that I'll be able to keep up a regular posting schedule going forward. I don't intend to quit the blog because it has been great motivation and I love sharing my creations when I've finally completed a big project, just don't expect it to be very regular for a while.

Since I've missed them the last few months, and I'm not sure when I might be able to post again I thought I'd end this post with a few book reviews.


Star Wars Millennium Falcon Owner's Workshop ManualStar Wars Millennium Falcon Owner's Workshop Manual by Ryder Windham

My rating: 4 of 5 stars


Written as a repair manual for the YT-1300 with specific information about the Falcon, in particular, I had a lot of fun reading this book. There are lots of specifics and diagrams to the point where you could probably build a very accurate cockpit replica for like a computer gaming room or kids bunk bed sort of thing using this for reference. It also includes excerpts from original marketing materials for the YT-1300, and information about the history of the Falcon and its previous owners.


Food Anatomy: The Curious Parts & Pieces of Our Edible World (Julia Rothman)Food Anatomy: The Curious Parts & Pieces of Our Edible World by Julia Rothman

My rating: 4 of 5 stars


This is a cute little book of illustrations about food and eating. It kind of makes me think of Richard Scary books for adults. There is an entire two-page spread showing different shapes of pasta. There is information about kinds of sushi, place settings around the world, and sandwiches for various regions. Overall, it is a very interesting book to browse through. If I had one complaint, it would be that sometimes the cursive captions can be difficult to read but I really had few problems with it.


A Year of Picnics: Recipes for Dining Well in the Great OutdoorsA Year of Picnics: Recipes for Dining Well in the Great Outdoors by Ashley English

My rating: 4 of 5 stars


I really, REALLY want to be the kind of person who takes lots of picnics. I like to be outside and I like to eat so it seems great. But somehow that never seems to happen. Maybe this book will help with that. Not only does it have recipes for picnic foods but each picnic follows a theme. They include tips for choosing the right site and suggestions for activities with each picnic. There is also information about the best ways to carry your picnic and tips for planning a menu that fits your site. For example, they plan a mountain top picnic and mention that if you are hiking to your location, that you want to pack things that are lighter and maybe don't require lots of extra like silverware or cups.

I am currently working on making the shirt and belt from the Bombshell Wonder Woman pattern to go with my shorts. I hope to have them done by the end of the month because we have a superhero day at work I could wear it for. Currently researching and price checking things for another costume, making space mice to sit with our Voltron lions and a coffee table makeover. My husband has started playing Witcher and it made me curious about the books so I've started reading those as well. It may take me a bit to get through them all since I tend to read things mostly through the library but I may review them later. Follow me on Facebook if you're interested in being notified about future posts, I promise I will get around to my projects in time.

Monday, August 14, 2017

Wonder Woman Micro Wardrobe

For our vacation last month, I had planned to have an all Wonder Woman inspired wardrobe. I had originally planned on something that similar to Disney bounding but it didn't turn out that way. (If you haven't heard of bounding and don't know what it is you can read about it here.) Part of the reason for the change was a lucky find of WW shirts on clearance sale and the rest was basically a lack of time to sew. Here's a bit about what I ended up with.

First of all, I have WAY more Wonder Woman t-shirts than anyone needs, but I don't care. I think the total is at 11 now? I only took some of these on our trip but they round out the entire summer wardrobe.


On a sad note, the Ice Cream shirt in this picture was an online purchase and I actually got a size too small to fit comfortably. I mean I technically CAN wear it but I'm not going too. However, pictures from this trip highlight how much Bear and I really need to lose some weight and get in better shape so hopefully, I can change that soon. Being able to finally wear such an awesome shirt can be motivation for my fitness struggles.

Then I also had a few plain colored shirts to mix in as well.
Dressier Shirt

Casual Shirt and tanks
For my bottom half, I actually did get some sewing done! First, this awesome, super comfy, shirred skirt with pockets.
Close-up of the pattern.

Also, I have a dressier skirt that I'd made previously, using that same fabric and red with silver stars on top.

I finished sewing the shorts from the Bombshell Wonder Woman pattern right before we left for our trip. Technically, I need to finish them by stitching down the facings but they are done enough. I also had some plain shorts and a pair of jean (just in case) to round things out.


I have a few matching sandals but mostly just wore the blue sneakers since we did lots of walking during our vacation.


Finally, I even had Wonder accessories and pajamas.

Nightgown

Tops from two different pairs of Pjs

Pj pants

The hair clips I received in an awesome gift exchange in a Facebook group I belong to. The headband, I grabbed spur of the moment near the checkout line in the grocery store. The small shrink plastic emblem, and metal charms I used on a pair of changeable clip earring. I haven't done anything with the locket yet but I'm sure I'll come up with something.

The only thing that I really feel is missing is some sort of sundress for fancy dress up occasions but since we didn't have anything we needed to dress up for during vacation it got left off. If I come up with a good idea for one I will probably still make it to complete the wardrobe. I might also make a few more subtle shirts for more of a bounding look but I have other projects I have to get to first.

I also made a new messenger bag to carry my stuff but it's not Wonder Woman themed. If you look closely at the pictures you can see that I have a few spots where I near to fix it. I didn't get all the edges far enough under the bias tape edging.


Monday, July 31, 2017

Experiencing Technical Difficulties

I apologize for not making a post before now. If you follow Eclectic Otter on Facebook you will have seen a little bit about the issues I've had this past month but here is a longer explanation. Our old camera had died and we were getting ready for vacation so we purchased a new one. I took some pictures for my post at the beginning of the month but had problems getting them to download. In fact, neither my husband nor I have been able to download pictures directly to the laptop still. I was able to get them on to our desktop in the other room because it has a direct SD card slot. After wasting several days trying to figure out that out and the post already being late, I gave up for the moment because we left for vacation that Saturday and I had other issues to worry about. For instance, we ended up taking loaner car on vacation because my husband's cruise control was broken and they were waiting on the part when we left.

I had also intended to have book reviews typed and ready to go before we left so that I could schedule it to post while we were gone but that didn't work out. I thought about doing a quick post after we got home but we got in on Saturday afternoon and that evening had a storm that knocked out our power. We didn't get power back until about 3 pm on Tuesday. Then Wednesday night another storm hit that caused flash flooding and we had to dry out all our carpet.

Things should (fingers crossed) be getting back to normal now and I can get back on track. I have lots of photos to share from my all Wonder Woman vacation wardrobe, to photos from the trip, and even pictures of the kitten we adopted when we got back because.... Oh yeah, we ended up adopting a kitten while our power was out just in case things were getting too quiet. So stay tuned and I'll try to catch up.

Monday, June 26, 2017

Librocubicularist- June 2017

I really do apologize for being so late posting this. The last few weeks have been really busy. In addition to the never ending battle to keep our yard looking well groomed, my husband and I decided that it was time for us both to get checkups. So we scheduled doctors appointments for both of us, which of course lead to more doctors appointments. I also had some extra crafting for a gift exchange that I participated in that took up a bit of my spare time as well. But you know, there's always time to read, so here are a few things that I squeezed in this month.


Literary Yarns: Crochet Projects Inspired by Classic BooksLiterary Yarns: Crochet Projects Inspired by Classic Books by Cindy Wang

My rating: 5 of 5 stars


This book is super adorable! It has instructions to make your very own amigurumi style stuffies based on famous literary characters. There are enough details in the direction and variations for hair styles that it seems like it would be easy to create designs for your own characters based on these instructions. There are so many great things here it's hard to choose a favorite, although I think I'm going to go with Anne of Green Gables. There are several with great accessories that make me laugh, such as Captain Ahab with a toothpick peg leg and Julius Ceasar skewered with cocktail swords. There's even a Dr. Jekyl and Mr. Hyde that uses a doll joint so you can turn his head from one face to the other.


Urban Watercolor Sketching: A Guide to Drawing, Painting, and Storytelling in ColorUrban Watercolor Sketching: A Guide to Drawing, Painting, and Storytelling in Color by Felix Scheinberger

My rating: 4 of 5 stars


This book has a lot of basic information about watercolor paint works, how its made, and how it can be used. I also felt like it had good advice about composition and finding your own style.


Star Wars: Dawn of the Jedi, Volume 1: Force StormStar Wars: Dawn of the Jedi, Volume 1: Force Storm by John Ostrander

My rating: 3 of 5 stars


This comic series is.... odd. I should say upfront that I've only read the first two so far. I have the third but haven't finished it. The blurb on the back of the book makes it sound like these are about the foundation of the Jedi. It was a little confusing to read at first because there was only a minimum of setup then launched into a story about a whole planet of people who are in balance with the force. There's a race of dark side wielding creatures preparing to attack. As you get further into the story it does begin to explain some things but I still feel confused. I think that a little more explanation up front would have made this series much more enjoyable.


DIY Temporary Tattoos: Draw It, Print It, Ink ItDIY Temporary Tattoos: Draw It, Print It, Ink It by Pepper Baldwin

My rating: 4 of 5 stars


I have never wanted to get a real tattoo, in part because I've never felt like I had an idea that I wanted to live with permanently. I really still don't but if I did this book would be a big help in working out exactly what I wanted to do. It covers a variety of topics related to tattoo design including subject matter, style, and location. While some of this information is specific to temporary tattoos (like which placements will crack or stretch) I feel like most of it would be relevant to creating actual tattoos. It would be a good way to test out a design before going permanent or just try a variety of things for temporary fun.