Monday, March 30, 2015

Librocubicularist- March 2015

I do a lot of reading and most of that takes place in bed.  When this term started popping up online it really amused me to know there was a specific term for it. So when I decided to do a monthly book roundup post I felt like this would be a fitting title.


Because of all the planning and work for our Pi Day party I actually didn't read as much as usually this month but here are the highlights.


Grisha Trilogy


Ruin and Rising (The Grisha, #3)Ruin and Rising by Leigh Bardugo

My rating: 4 of 5 stars


While driving around on Valentine's Day my husband and I had a long conversation where we both talked about role-playing campaign worlds we are designing. As part of that conversation I asked him about what he thought made something Russian.(As in if you wanted to create a country that had a Russian feel but wasn't actually Russia what would it be like.) Our conclusion was that it all boils down to names. The words that you use to describe things is gives the feeling more than what kind of climate or government a place has or the kind of monsters you choose to inhabit it.

That conclusion is backed up by this series. The names for everything from cities and people to types of architecture, food, and clothing come together to give the Russian feel.The books are set in a country that is split in two by the Shadow Fold, a stretch of land shrouded in constant dark and shadow, inhabited but vicious monsters. The main character is an orphan girl named Alina who learns she possesses a special power that could help eliminate the Fold. The story follow her as she transitions from a girl struggling to understand her own powers to the savior of her people.

The plot revolves around her striving to learn to use and control the power herself and others attempts to gain control of her power for their own ends. There's a spooky magic user who controls shadow and a creepy priest who makes me think of Rasputin.

This series has lots of things I think my husband would love. It sets up an interesting new magic system and has a smart aleck pirate who (view spoiler), a character type he really likes. I enjoyed the series because it was fast paced and easy to read and liked the interplay between magic and technology and the overall atmosphere. I also liked the Russia atmosphere of the books, its not a setting that gets used a lot and was a refreshing change.

Age Recommendations:
These books are billed as young adult novels and I stand by that. If you have a very mature middle school kid it may be okay but they contain some intense kissing against the wall kind of romance scenes and monsters that rip people apart and eat them so use your own judgement there.


Washi Wonderful: Creative Projects & Ideas for Paper TapeWashi Wonderful: Creative Projects & Ideas for Paper Tape by Jenny Doh

My rating: 4 of 5 stars


This book contains great ideas for greeting cards and gift wrapping using washi tape. All of the projects instruction are very straightforward and easy to follow. The projects also use just a few common tools making it very easy to get started. I really love gift wrapping and am eager to put some of these ideas to use. I made one of the decorative flowers in about 5 minutes while watching tv.

Age Recommendation:
Due to the limited tools involved the majority of these projects could be completed by fairly young children. Most projects would be appropriate for later elementary school kids. Some of the cards use collages of tape which even younger kids could help with.


Cookies & Cream: Hundreds of Ways to Make the Perfect Ice Cream SandwichCookies & Cream: Hundreds of Ways to Make the Perfect Ice Cream Sandwich by Tessa Arias

My rating: 4 of 5 stars


My husband loves to make his own ice cream and has been toying with the idea of making his own ice cream sandwiches for a while now so when I came across this book at the library I had to check it out.

It starts out with some basic techniques for ice cream bases and different types of cookies as well as some assembly tips. The rest of the book is recipes. There are about 50 pairings for ice cream sandwiches such as Apple Pie, Lemon-Blueberry, and Black Forest. All of the recipes can also be mixed and matched to create a large variety of other treats. With the weather starting to warm up maybe we'll have a chance to make some soon.

Also this cookbook includes pictures of every ice cream sandwich which is something I really like.

Age Recommendations:
This book would be awesome for anyone of any age. Even little kids can help measure and mix, and who wouldn't want to help make ice cream sandwiches?


View all my reviews

Thursday, March 26, 2015

My First Pocket Scrapbooking Page

I really love the idea of scrapbooking, of having something to look back over the years at all the fun things you've done, or even the current trend of documenting the everyday so you can see how your family and routines have grown and changed. I have piles of photos that go clear back before I was born and lots of scrapbook supplies but somehow no scrapbooks. Not even a single page just waiting for an album to live in. I'm particularly interested in Project Life and other pocket scrapbooking systems like it. (I don't really know what it is but something about all those little cards just appeals to me.) I have downloaded a bunch of freebie cards that you can print yourself and never used them. Sometime last year I even purchased a few physical cards and a pack of pocket pages hoping that if I had everything I needed I'd be more likely to start... but so far nothing.

That all changes right now...

As soon as we got home from our camping trip I uploaded our photos from the camera. Then I got out my pocket pages and started planning...


Unfortunately one of the things that causes me to procrastinate is over planning. After uploading the pictures I browsed through my Pinterest boards for inspiration and to see if I had pinned any free Project Life cards that would be good with these pictures. I sorted through my digital scrapbook files and wondered how they could be used with the pocket pages. I pondered how I could use Photoshop to add journaling information to the photos before I have them printed. Exactly one week later and the only thing I had done was more planning.

So I made a list of all the photos I had and chose a page with enough pockets (plus a few for journaling) and started assigning photos to each space. It took me quite a while to do this. Some pictures looked much better in a horizontal format and others could be cropped to work either way so I ended up playing around with it for a while. At the end of the night I had a list of which pictures I needed to print and what sizes I needed them to be. I uploaded my photos to a website for printing, selecting the options to pick them up at a location near home. I did do just a little bit of Photoshop work. I added a compass and coordinates to a picture of my niece by the river and a caption to the bottom of another.

Weston Bend State Park- River Trail
Then Wednesday I picked up my photos on the way home from work and got started. It only took me about 10 minutes to get the pictures cropped and in place. I used a couple of really cool tools to make it super easy. (Scroll down to the bottom of this post for a list of supplies and tools I used to create these pages.) The first was a 3x4 card punch I used to crop some 4x4 photos and punch out some journaling cards. It was a size that I couldn't find online for printing photos but is used for journaling cards on a regular basis. I had purchased it when I found a good sale hoping that making things easier would get me scraping and after using it I can say that it really does speed things up. It would have taken much longer if I had needed to crop the photos by hand. I also used a pair of Fiskars Corner scissors to round the corners on all of the other photos. It looks like this product is no longer in production but they do have a punch that does the same thing.


After I had all the photos in place I printed out journaling cards for the remaining spaces and cropped them down using the same tools. See a before and after shot below.


After that the only thing left for the camping pages was to write about our trip. The page for Pi Day has a few hidden pull outs so it took a little extra work. I cut a small tab and glued it on the back of the leftover pizza so that you can pull it out from behind the other photo. I also scanned the comments from our guest book and shrunk them down using Photoshop so I could fold it easily and tuck it into the final pocket. Here are the final results I apologize for the glare and bad quality, I will try to get better ones and replace them later. (Update: Added New Photos 3/29/2015)


Products Used:


Monday, March 23, 2015

Product Review: Etching Cream

When I decided to make commemorative glasses for our Pi Day celebration I had never etched anything before but it seemed like it should be pretty easy. For the most part it was.

I purchased Armour Etch etching cream and Blank Reusable Stencil Material.


I had a few problems with making the stencil. To start with the stencil material is almost to thick to see the design through but I taped it to the window and used the light to help me see it and that worked fine. The other problem that I had was more of a personal problem than a tool problem. When I made the logo for our cups I made sure to chose a font that would be simple to cut out but I didn't think through how to cut out the letters until I was already cutting the stencil. So I had to make decisions on the fly about where to leave connector for things like the center of the letter. I actually procrastinated quite a bit on cutting this because I was afraid I'd mess everything up. Bear thought it was cute, he said he'd never seen me this stressed out by a craft before. That being said when I did finally get it done I was pretty happy with it. One section is a little delicate because the letters are so small but it worked just fine. (I'll probably never use lettering that small again but simple design like the bear I used are really easy to cut.)

I don't own any fancy cutting machines like a Cricut or Silhouette but if you did it would simplify the cutting greatly. Just use it to cut the design out of adhesive-backed vinyl and use that.

I ended up with a three part stencil: the bear silhouette, the scroll with the letters, and the shield outline. It was a little tricky to get the stencil positioned the first time but it got easier as I worked. Its important to make sure you don't have any air bubbles or the cream will seep underneath.


My bottle of etching cream didn't have instructions, just safety information, but luckily the stencil material did. It suggested leaving the cream on for just one minute but when I checked one corner it didn't look etched and I was nervous about having to reposition all the stencil parts. When we checked it at 5 minutes it still didn't look etched but I decided to take the stencil off anyways. I figured it that didn't do the job it would never be done. However after rinsing it off it looked great! 

Did it etch?
That's my main tip for using this etching cream. When you are rinsing it, it doesn't look etched but as it dries the design shows up. We ended up using a 5 minute time for all the glasses we made but the suggested 1 minute would probably have been fine.

Now I see it!
We ended up with 16 glasses in total and the stencils held up very well to all the repositioning. The exception to this is the piece you see in the picture above. All the tiny bits like the spaces in the letter E stretched as I pulled it off of each glass. By the end I was afraid it would tear before I finished. It made it through but I wouldn't trust it for any further uses.

In conclusion I really liked both of these products. The stencil material is easy to cut and position and seems like it holds up well to repeated use. I've kept the stencils and will try to remember to update this if/ when I use them again with how they've held up over the long term.

The cream is super easy to use. Just brush it on in an even layer and let it sit. Everyone at our party loves their favors. I have quite a bit of etching cream left over and plan to etch something on our trifle bowl and a few of our casserole dishes to label them for potlucks.

Party Cups Ready to Go

Friday, March 20, 2015

First Day of Spring

It's the first day of spring and I super excited that its finally warm outside. I don't have to wear a big bulky coat all the time and we can open the windows and get some fresh air in the house. Unfortunately warmer weather brings its own problems to our house. We've already found a snake in our dining room...

Some where around our back door we have a gap just big enough to let small garter snakes inside. Our three cats think this is amazing! Mostly we find dead snakes with the cats batting at them but too often they are alive and trying to escape to hide in the house. (Still I suppose this is better than finding dead snakes that have been hidden.) Now that is warm hopefully we can find time and money to replace the weather stripping and that should help.

Waiting for a new toy
Our yard needs a bunch of work right now. Some brush clearing, some leaf removal, and clean up of all the junk that had blown into our yard from elsewhere over the winter months. But our flowers are starting to bloom and I can't wait to get the patio spruced up and enjoy some time reading outside.


Thursday, March 19, 2015

Pi Day

Last year my husband I backed a Kickstarter for Fantasy Coins and ordered a pile of awesome metal gaming coins. Ever since they arrived we have been looking for excuses to use them and show them off. We came up with the idea to use them for a geeked out poker night and this years Pi Day offered a perfect date for the party. Basically we decided to have a super geeky poker night.

Some of our Kickstarter coin loot
If you've never heard of Pi Day it occurs on March 14th and honors the mathematical constant pi. This year is special because at 9:26:53 the date and time represent the first 10 digits of pi.

Check out this article on Wikipedia if you want to learn more about how the celebration got started.

The first thing we did was invite a bunch of friends using fancy scroll invitations. We decided to turn our house into a Dungeons and Dragons style tavern for the party and decided on the name Bardic Bear in honor of my husband. I typed up the invitations using a medieval font and then used coffee to stain the papers. Below is the text minus some private information.

The Proprietor of the Bardic Bear Tavern requests your presence for a very special Pi Day Celebration.

Festivities begin at the tavern (located at -----) around 4:30 in the afternoon and reveals are expected to continue late into the night.

Scheduled entertainments include rounds of At the Red Dragon Inn/ Three Dragon Ante as well general comradely around the gaming table.


A feast of various hors d'oeuvre as well as pie in both pizza and dessert varieties will be provided. However guests are encouraged to supplement the feast with their own favorite pies and beverages.

Close up of coffee stained paper
To do the staining I used a cookie sheet with a lip on it and crumbled the paper and painted the coffee on with a brush. After letting it sit for about 20 minutes I drained off any extra liquid and baked them on my lowest oven setting to dry them out. Then I painted some small dowels gold and glued one to each end of the invitation. Finally I rolled them up around the dowels and tied each one with a bit of ribbon. The result was awesome scroll invites for everyone.

Finished Invitations
The next projects we tackled had to do with decorating our house for the party. I created a logo for the tavern that we used for a couple of different things. I used a google image search to find a picture of a bear with his arm raised so he looks like he's singing or maybe performing some kind of monologue. This is the finished product:


We used this to make a tavern sign for our front door. We also put up this cool cardboard trophy head with papers underneath for a guest book. We also made a sign for our office door. This was a very necessary decoration because we have three cats one of whom will get into food and trash every chance she gets. They were contained in the office and had their own little party with toys and fluffy blankets to nap on.


The Pi Day Party was awesome. We had a buffet set up with stuff for sandwiches and guests brought pie. There's a nearby pizza place that makes a 30 inch party pizza that we have been looking for a reason to order and that was the main course. We had to bring it in through a window... 

Party Pizza: Before
Some of the male guest took this as a challenge and tried to defeat it but we still had leftovers. Even after we sent people home with leftovers.
Party Pizza: Aftermath
We had enough expansions of At the Red Dragon Inn that we could have 9 people playing at once. That was set up at the dining room table with our Kickstarter coins as the money. We also had a small coffee table with some other games in the living room.


We all hung out played games and ate pizza. It was fantastic. The party ended up lasting about 6 hours and every guest went home with a commemorative drinking glass. (More about this in my next post.) We hope to turn it into an annual event and are already talking over ideas for next year. Possibilities include pot pies, a build your own pizza bar, and Bardic Bear t-shirts.
Pi Day Party Favors


Sunday, March 15, 2015

Dresden Files Quiet Book- Part Two

We are super busy this weekend. We have a big party on Saturday for Pi Day and on Sunday we are playing in our first ever 5th Edition game of Dungeons and Dragons. We also have shopping to do for a short overnight camping trip on Monday. While we are out having fun check out the final page of my Dresden Files quiet book.

Page 5- Sue the Zombie T-Rex


If you've never read the Dresden Files this won't make much sense to you but nearly everyone I know has the same favorite scene. Harry Dresden riding an animated zombie T-Rex created from Sue at the Chicago Field Museum.

Materials:
Felt
Velcro
Sharpie or fabric marker

Step One: Cut dinosaur bones out of felt and sew a bit of Velcro to the back of each.

Step Two: Add matching pieces of Velcro to page.

Step Three: Cut out a 'crate' to hold the pieces and sew it to the page.

Step Four: Write directions on the crate and party with a zombie T-Rex.


Putting the Book Together


Materials:
Felt for front and back cover
Felt Piece for decoration
Paint
Ribbon
Metal Eyelets (and tools to apply them)


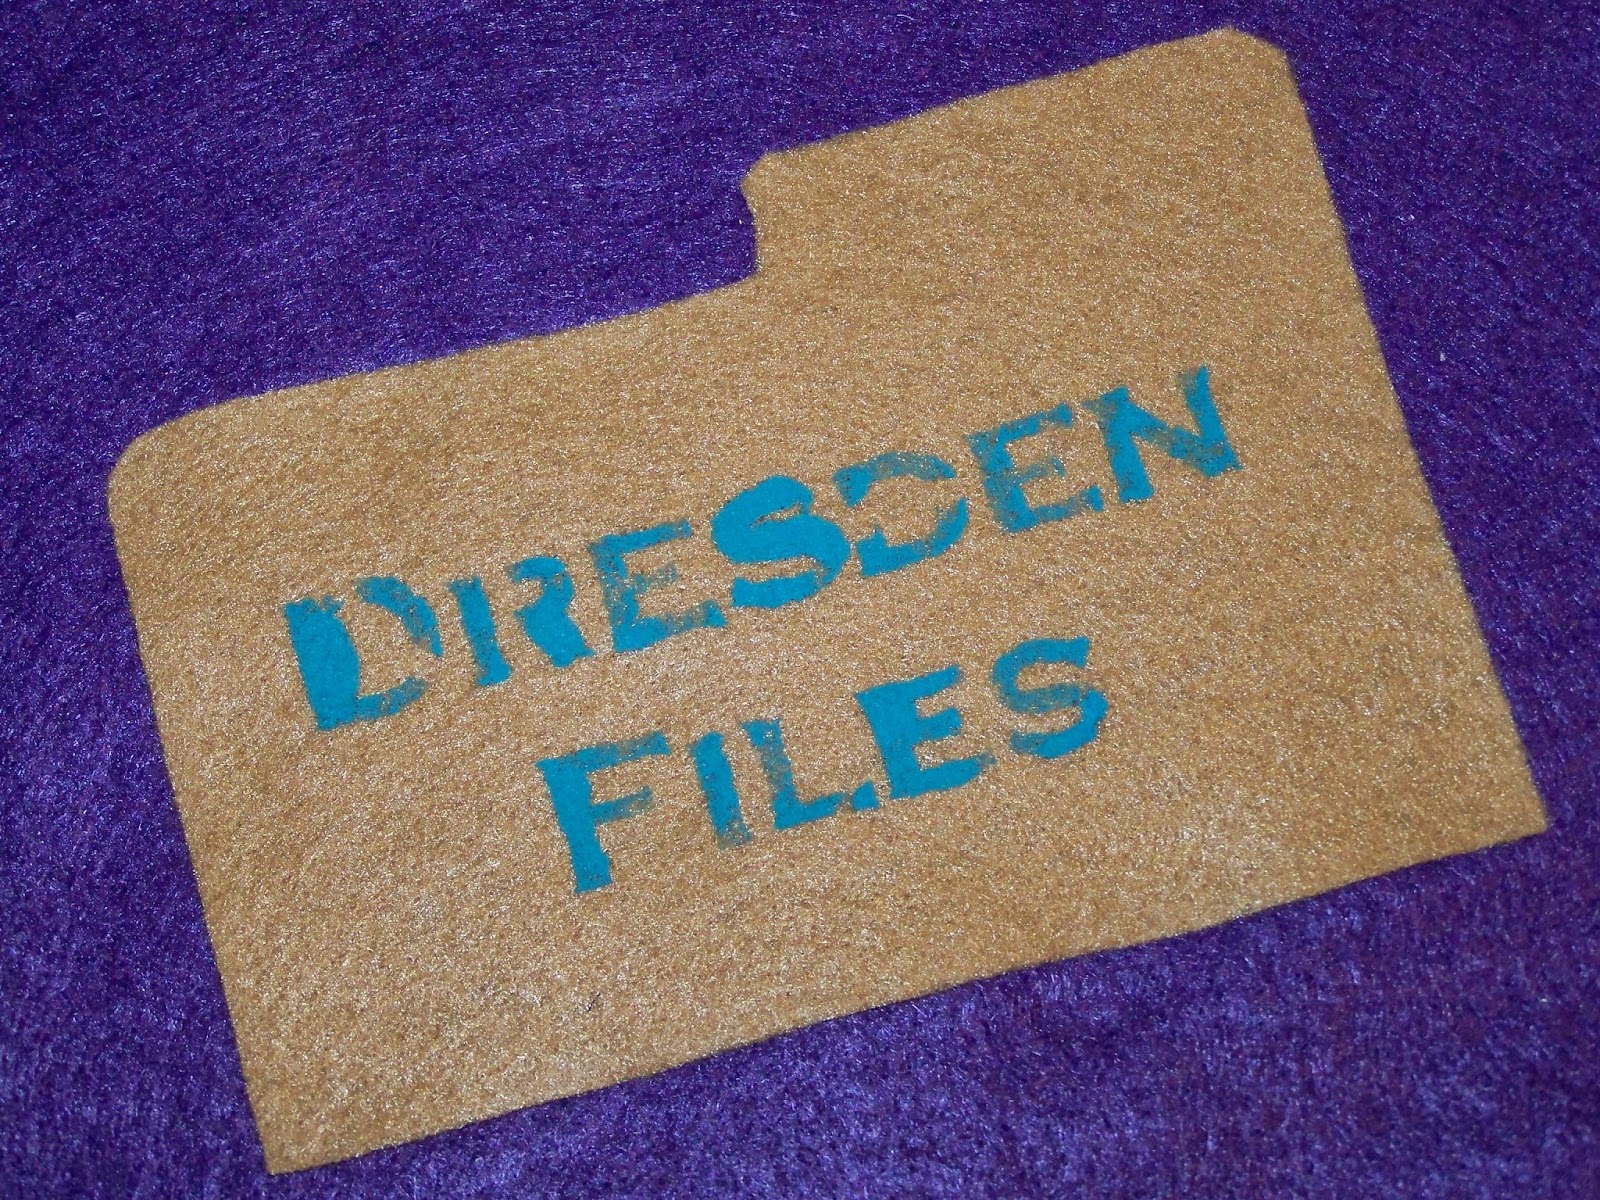
Step One: Decorate the cover. I kept mine super simple with a file folder cutout. 
              A: Cut out folder shape.
              B: Make stencil for title.
              C: Stencil title onto file folder with paint.

Step Two: Decide on the order you want the pages to go in. Put the back sides together and sew around the edges. Sewing the pages together hides all the random stitches on the back and adds a bit of stability.

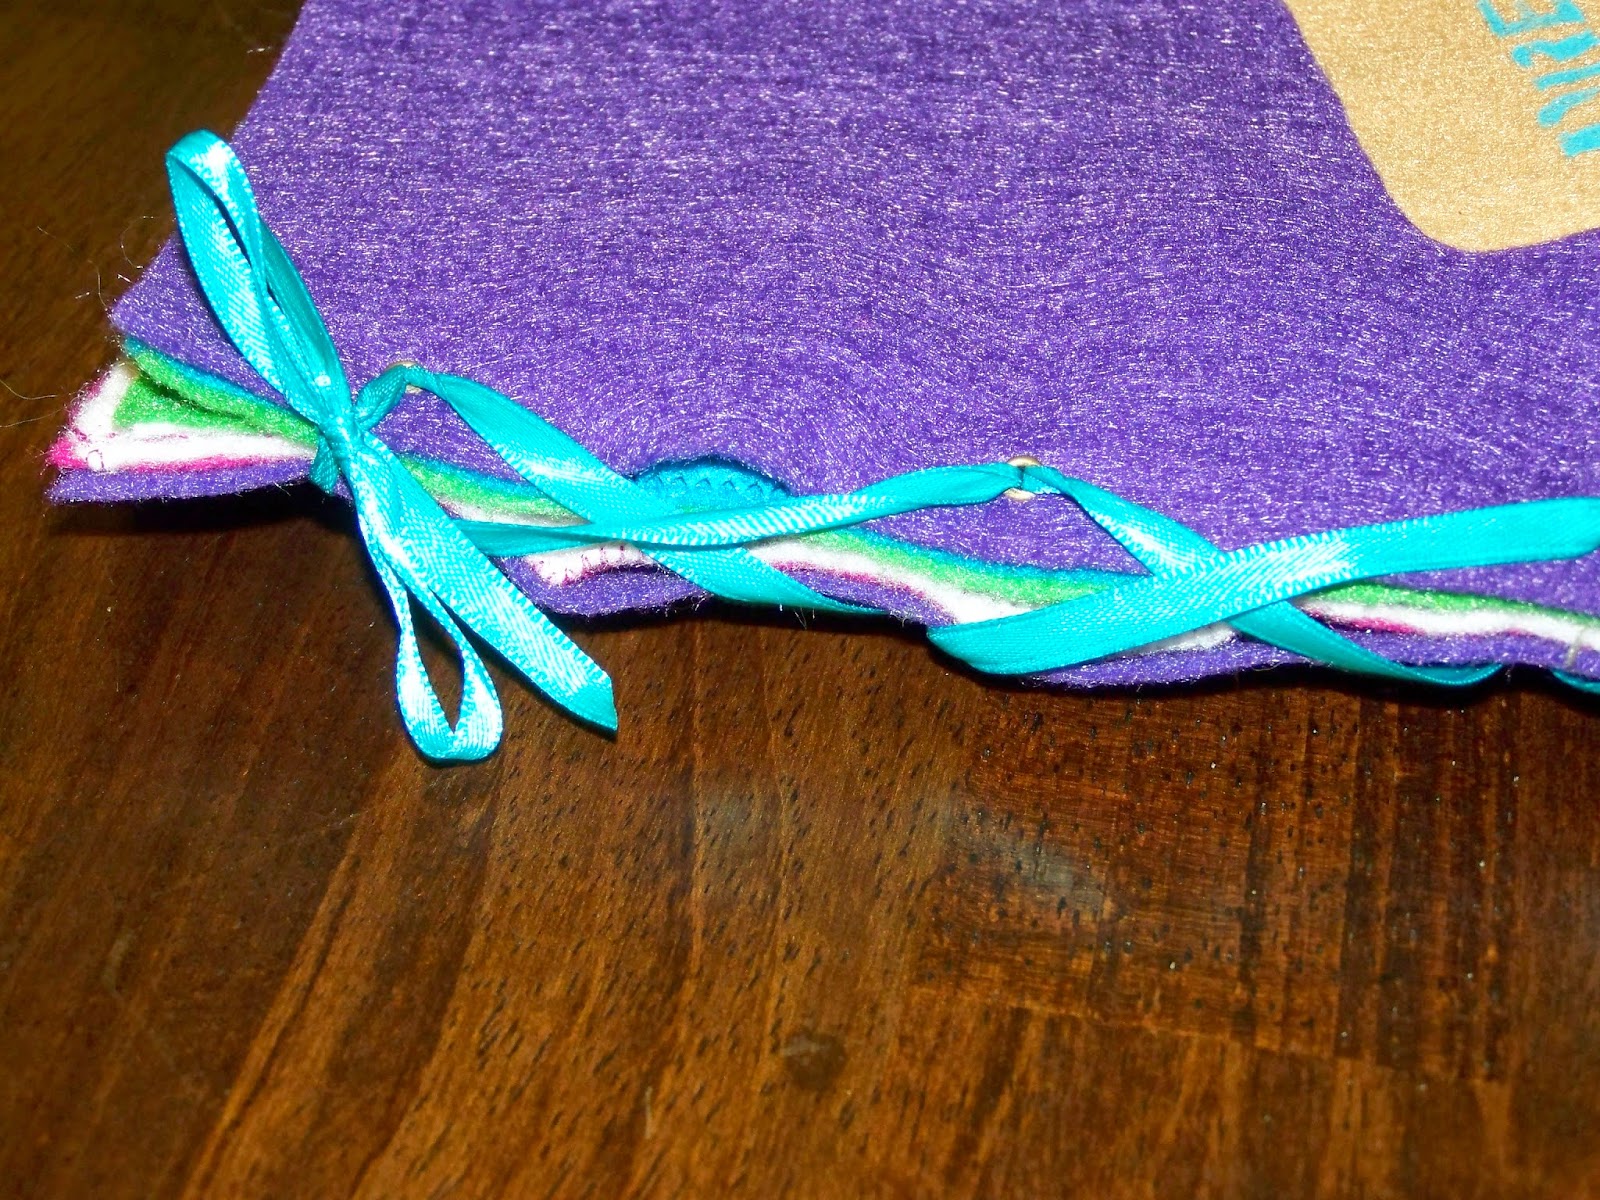
Step Three: Add eyelets to each set of pages. I used 5 spaced evenly between the top and bottom.

Step Four: Cut a long piece of ribbon and lace the pages together kind of like lacing up a shoe. Tie the ribbon in a bow at the top and you are done!


Hope you all enjoyed the book and have a great weekend!


Wednesday, March 11, 2015

Dresden Files Quiet Book: Part One

I want you to know that I have been crafting but I can't tell you exactly what I'm working on because its a surprise for our Pi Day party this Saturday. I promise to tell you all about it next week but for now I wanted to share an older project that I did just because its awesome.

A few years ago I was inspired by the great, geeky quiet books on this blog. My husband and I currently don't have any children of our own but friend of ours had recently had a daughter and we wanted to make them something. Since they are both fans of the Dresden Files by Jim Butcher my husband suggested I make a Dresden themed quiet book. I can't remember exactly but I think it started out as a gift for her first birthday... 

We ended up having several conversations about pages ideas. The books have some creepy supernatural stuff so we needed to find things that would obviously connected but still kid friendly. The whole point of quiet books is that they are interactive so we also needed to be able to translate those ideas into pages that moved. In the end we picked 5 ideas and got to work. All of the shapes used were either drawn by hand or traced.

Basic Materials:
Felt Squares in various colors
Craft glue
Sharpie Markers or Fabric Pens
Velcro
Sewing Machine and Thread


Page One- A Phone to call Harry at his office.


Additional Supplies:
Spiral Shoelace
Stuffing

Step One: Cut out all the felt shapes. I used black for the main part of the phone, grey for the hook, and white for the numbers. The handset is stuffed so you need two matching pieces.

Step Two: Use craft glue to glue phone to page. I laid everything out first to get an idea of where things needed to go. Hook first, then the phone base on top, then the number pad over that. Leave a small unglued section on one side so you can tuck the shoelace underneath then glued that section.

Step Three: Use marker to draw number on the phone and write message on background.

Step Four: Sew on side of Velcro near the phone hook and the other on one piece of the handset.

Step Five: Position one end of shoelace between the two sides of the phone and sew the sides together. Be sure to leave a small opening to add stuffing. I also went back over the section with the shoelace just to reinforce it. Add a bit of stuffing and sew the opening closed. Velcro phone in place and enjoy.

Page Two- Actually a two page spread with a maze featuring Harry's cat Mister.


Additional Supplies:
Satin Ribbon
Stuffing

Step One: Decide on a layout for your maze and form the path by sewing the ribbon down with a decorative machine stitch.

Step Two: Cut out and sew together cat shape. We attached a ribbon during this step so that the small pieace wouldn't fall out and get lost.

Step Three: Cut out a shape for your starting and ending locations. We used a white house to represent Harry's apartment and a bush for the cat to hide in.

Step Four: Sew the other end of the ribbon attached to the cat near where you want your starting line. Cover this with the bush and sew the bottom and one side to make a pocket for the cat to sit in. Glue on the house for the finish line.

Step Five: Use marker to write instructions.  


Page Three and Four- Harry's Lab

Harry's Lab
Make a Potion


Because these two pages are very similar I'm going to talk about them at the same time. When discussing differences I'll refer to either lab or potions page.

Additional Materials:
Lab- Scrap of clear vinyl                                                            Potions-Stiff, heavy interfacing
Stiff, heavy interfacing                                                                Fusible web (I used Heat and Bond)
Fusible Web (I used Heat and Bond)                                          Scrap of plain cotton fabric
                                                                                                     Thin cording
                                                                                                     Cord slide
                                                                                                     Puffy paint or other fabric paint

Step One: Cut all of your shapes 3 times. One each out of felt, interfacing, and fusible web.

Step Two: Sew a small piece of Velcro on the back of each shape cut out of interfacing.

Step Three: Use the fusible web to attach the felt shapes to the interfacing.

Step Four: Layout where you want your shapes to go and sew the opposite pieces of velcro to those spots.

Step Four and a Half: For the lab page I drew in shelves to hold the items and traced around them. I wanted to make these pages somewhat educational so the lab page is about shape matching and colors and the potions page is about numbers. I didn't trace the potions bottles because it didn't seem necessary to me but I did use puffy paint to write the numbers on.

Step Five: On the lab page I made a simple clear pocket to hold the shape. I wanted it to be clear to show the 'mess' in the lab. To attach the vinyl to the page I just used a zigzag stitch on the machine to sew two sides to the felt backing.

For the potions page I made a pouch shaped like a cauldron (even though Harry doesn't mix potions in a cauldron). Cut out two cauldron shaped pieces of fabric but add a bit to the top to fold over and make a place for the cord. Fold the tops down and stitch along the bottom of the fold. Then put both pieces together with the folded piece on the outside and stitch around all sides except the top. Turn it inside out so all the seams are inside and hidden.

The next part is kind of tricky.... Sew just the back side of the bag to the page. I wish I had pictures of this step so you could see how its works but I just don't. Sorry.

Then put the cord through the folded part and then put both end through the cord slide. There might be a better way to do this but I wanted a solution that would be easy for kids to open but close tight enough that all the pieces don't get lost.


I hope you've enjoyed the pages so far, stop by this weekend to see the final page as well as instructions for how to put the book together.