Thursday, April 9, 2015

Off on an Adventure- How to Organize your Gear

My personal Pinterest account is a little out of control...


I realized earlier this week that I have 100 boards on Pinterest, but all of them represent some type of inspiration. My latest idea comes from an image that's appeared in my feed a lot recently. The link takes you to a series of pictures showing a character sheet organizer.The first few times I saw it I tried to determine what was used for the base and think of how I could make something similar.

Eventually my husband was able to identify it as the box from World of Warcraft Trading Cards and told me we even have a couple hiding out in our house. So I decided to make a couple to help keep us organized for games away from home. I'll show you how I customized the boxes as well as some alternative bases you could use to make a comparable box. Also as a bonus I've included another project we've been working on for my husband's campaign.

My first thought was to use one of the large PC game cases, but after looking at one more closely I'm not sure its the best plan. It does have the clips on the side and technically would work but I think the disc holder would be in the way. As an alternative (for those that don't want to buy the card sets) I was able to make a simple mockup using a large VHS case. I used cardboard to make a divider for holding dice and also duct taped on a flap to make a lid. If I were going to make one for actual use I would glue down the divider and use some other material for the hinge. My initial thoughts would be either ribbon or maybe a flexible plastic like from a milk jug so that it would be more durable.  For the other side you could glue in some kind of binder clip and a loop of elastic to hold a pencil.


The basic card boxes look like this:


Remove the cards and fill it up with dice, minis, or other game supplies. Then all you need to be ready to roll is a new  custom cover.

To Make a Case Cover:


Click File, New, Blank File. It will pop up a box like the one below. Enter in the size cover you need. The card boxes are 7.5 inches high by 11.75 but you might want to adjust it to 7.5 by 11 if you are printing on regular paper, otherwise you will end up losing part of the design.


I used the shape tool to add a rectangle to mark the spine portion and help with placement of other items. Then I added a text block to the left (back) side. I used it to type up the information about my background but you could put lots of stuff there. The inspiration piece used a reference for attacks of opportunity, another idea would be to make a kind cheat sheet for new players showing what modifiers they needed to add to their rolls to accomplish different actions. I also added name and other character info to the spine portion.


Finally I dropped in a character portrait for the front and used the paint bucket tool to fill in the remaining background. I also added a picture to represent a mysterious orb that my character has. For my husband's I put a magic circle on the back and made a transparent rectangle over it to help make the text more legible. 


Curious about that stack of cards with the scimitar on top?


That's the bonus project I mentioned at the start of the post. Part of the fun of a RPG is gathering up cool weapons and other equipment but usually they are just numbers on your character sheet. We thought it would be nice to have a visual reference so we decided to make item cards. Hopefully it will add some visual inspiration to our games. It even opens up the way for more difficult upgrade decisions. Almost anyone who has played an online game has experience the difficult choice between a weapon that's super ugly but powerful or the less effective but awesome weapon. (My husband plays World of Warcraft and is constantly transmogrifying items so they look better with his armor.) They can also be used for items that are more a part of the plot than a piece of equipment, like a mysterious magical gem or a key to an unknown lock. We have also thought about making a deck with character portraits to use for NPCs. If you don't want to make item cards you could hold other things there like extra dice or maybe a critical hit/miss deck if your game uses one.

To Make the Cards:


Start by opening up the template for Item Card Fronts. (Download at bottom of post)

The screen should look like this:

Click on File and select Open to chose the photos you want to use for the cards. They will appear next to the template in the photo bin along the bottom of the screen.


Use the Move Tool to pull on of the pictures up onto the template. It will most likely either fill the background of the template or appear on top of everything. Now on the right hand sidebar grab the picture you just added and move it so it is directly above one of the card shapes. It will now hide that card shape.


In the same sidebar, right click on the picture and select Create Clipping Mask. 


This will make it so that only the portion over the card is shown. It will also add a little arrow on the side to show what layers are clipped together.


Use the points on the corners and the move tool to resize and move the photo so that the portion you want is showing on the card. For some things, like swords, this can get a little weird. You will either need to focus in on a specific feature like the hilt or leave the background color showing along the edges.


Repeat these steps until you have all 6 cards filled and it's ready to print. If you want something on the back side check your printer instructions to see which way to turn your paper for two-sided printing. After you print the front open which ever template you want for the back, turn the page and re-insert it, print the template for the back side. I left the back sides colored to show where the edges are but you could change them to white if you didn't want to print the color.

We used the backs to give quick reference information for items attributes while leaving the main portion open for a description of special abilities or other notes about the item. We also plan to use them to make a portable mini spell book for any spellcasting characters we may play. You can print out just the spells you know or print them all but only take out the ones you have prepared for the day. With just a small stack of cards you can reference the exact damage for a spell without having to flip through pages of spells that aren't even for the class you are playing. Let me know if you have any other ideas for how to use cards I'd love to hear about it.

You can download the templates I made by clicking on the links below.

Templates:


Item Cards- Other
Please feel free to leave a comment letting me know what you think or offering suggestions for improvement. Also this is my first attempt at adding a download so let me know if it's not working right and I'll try to get it fixed.


Monday, April 6, 2015

Curtain Week Part 2 or How I Procratinate

I am still a work in progress.  I decided to start writing about my projects to help curb my tediency to procrastinate. So far I have been doing fairly well and have gotten more done in the past month than I have for quite a while. I have two main ways in which I procrastinate. The first is that I overplan, constantly tweaking things so that I never get around to actually starting the project. The second problem is that I start something then am inspired by a new idea and end up abandoning the current undertaking to start an entirely new venture.

Our Window Before
I apologize for the poor quality of pictures this time around. The only source of light in our bedroom is the window and a single overhead light. So trying to get good pictures (especially of the closed curtain) was really tricky.

My plans for this week suffered from a combination of the second problem and the constant call of library books.Wednesday night I stayed up much too late reading The Book Thief and slept in on Thursday. I even read in bed for a while before I actually got up. When I finally did get up in the morning I installed the curtain rod and hung our bedroom curtains but then it was time for lunch. After I realized that I had a bunch of books due Monday that I hadn't even looked at so I spent most of the afternoon reading BiblioCraft , which set off inspiration for a series of other projects. Somewhere in there I also made a trip to Lowes for snake repellant and some other supplies to try and get our yard cleaned up so its less of a snake paradise.

Window After
 Of course because I slept in I wasn't sleepy at bedtime and stayed up too late reading again. The combination of that and the new light blocking curtain in the bedroom meant I slept way later than intended on Friday. I'm ashamed to admit it was almost past lunch time before I got out of bed. As soon as I got up I went down the street to my parents for a little bit to return their drill. (Borrowed quite some time ago but very recently used to hang curtain rods.) By the time I left and actually got myself some lunch it was almost 3. Now for those of you who don't know that actually not as late as it sounds because Bear works an 11am-8pm shift so it's usually around 9 when we have dinner but anyways....

After lunch I used my rotary cutter to even up the edges on the fabric for the office window. I hemmed up all the side but when I held it up to the window it was slightly too narrow so I had to rip out the sides. That was frustrating so I waited until after dinner to iron out the old seams and sew it up again.

Saturday was kind of a special day for us since I normally have to work a closing shift but this week had the day off. We spent a good part of the morning cleaning up brush and leaves along the side of our yard to help curb the snake incursions. The rest of the day was pretty much dedicated to relaxing and enjoying the extra time together. We went grocery shopping together which seems like a chore but we both really enjoy it. We grilled a turkey for dinner and had a long discussion about possible adventure ideas for a Pathfinder Campaign he's getting ready to run. Sunday was a combo of laziness and chores. We woke up reasonably early but took our time getting started with our work for the day which was mostly washing dishes with a little other light cleaning. I ended up doing sink load of dishes while my husband fixed up some delicious homemade quesadillas. After lunch he played some games while I surfed the internet for pictures to use in my next project. Finally we finished up the weekend with a nice glazed ham and scratch-made scalloped potatoes for Easter dinner with my parents. We also had strawberry cake and my husband's new favorite drink, Blackberry Ginger Ale.


It was really nice to have some down time with my husband and I promise I'll get those curtains done someday. Hope Everyone had a Happy Easter.

Thursday, April 2, 2015

Curtain Week or Unexpected Free Time

This week has been kind of a strange one around here... I am only scheduled to work one day this week and that day was Tuesday. Since I have some extra free time I felt like I should take advantage of the situation and get big projects done. We have lived in this house for over 5 years now and still have several rooms that just have the plain blinds that were up when we moved in. I have fabric to
make curtains for 3 rooms that's been sitting in the closet for almost that long. My goal is to complete the curtains before the start of next week.

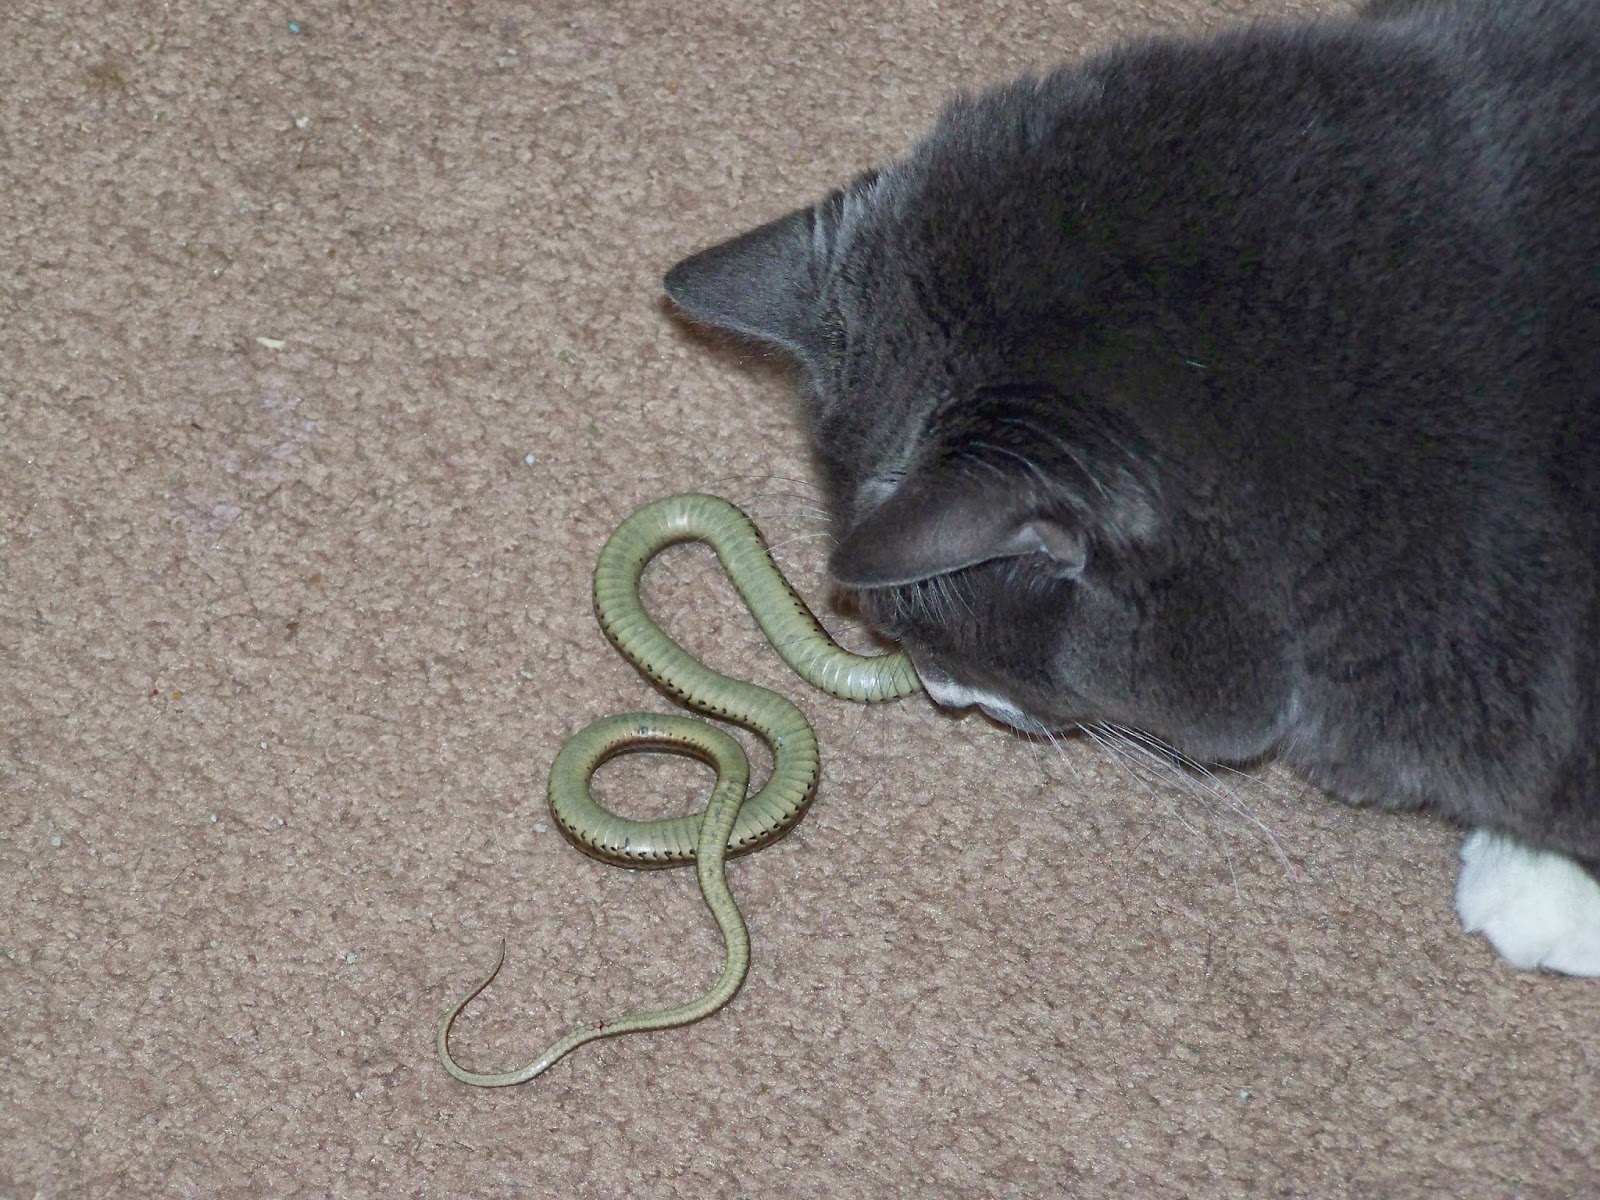
I used my day on Monday to try and get the everyday housework under control. I did all the laundry, washed dishes, even put some of our winter coats into storage. During one of my trips down the hall I was startled by not one but two snakes. We have been really lucky thus far in that our cats have always waylaid any snakes before they get far enough into the house to find. Previously we thought they were getting in by our back patio door but this pair was by a side door....right by our bedroom. Although we suspect that the snakes came in the same way and were dragged over by the cats we don't really know for sure and it's definitely time to take preventative steps. No one wants to step on a snake while still only half awake! In addition to the yard work and weather stripping triggered by snakes we are also facing some plumbing issues. A few weeks ago the water pressure in our bath went out. The shower works okay but there's only a tiny trickle of water when you try to use the bath. So we are trying to figure that out.


This is all a very roundabout way of saying, when I got home from work Tuesday I didn't really feel like doing much of anything. However in the back of my mind I knew that I needed to have something to post about, so after a short break I got out my fabrics. After years spent folded in the closet all the fabric needed ironed before anything else could be done. So I ironed, confirmed the amounts of fabric I had, and re-measured all of the windows. I admit that it wasn't a significant amount of work but it was something active, something that will help us to enjoy our house a little better, and that was my goal in starting a blog.

Fabric Before Ironing

It was really nice to have everything ready to go when I got up on Wednesday morning. I ended up needing to iron everything a second time with steam to get rid of all the creases, but I was able to get the curtains for our bedroom completely finished. (Sewn anyways, we still need to put up the rod to hang them.) We only have one small window in there and it looks right onto our neighbours side porch light so we needed a blackout lining. I also decided that I wanted to try and make the window seem bigger so the curtain is actually larger than it needs to be. The curtains are a very simple style so all I did was lay the fabric and lining out and sew them together.

I started out by evening out the edges and putting a small hem on both sides. I did the best I could to keep the lining and fabric even but my table isn't quite big enough to lay it all flat at once. After that I folded the top edge over a few times to make a pocket for the curtain rod. Then finally I hemmed the bottom edge. On the top and sides I sewed the fabric and lining together but on the bottom hem I sewed just the fabric. Everything is set up so that when we pull the curtain it looks like it covers a big window but when its open everything pushes to one side so the window is completely uncovered letting in as much light as possible. Below is a diagram showing where the brackets for the rod will go in relation to the window.


I should be able to finish that up with no problem tomorrow as well as a roman shade using the black cherry blossom fabric above for our office. Depending on how long that takes I have a more complicated set of curtains for our dining room using the fabrics below. We'll see how it goes since I also have a couple of really interesting library books and inspiration for a cool carrying case for roleplaying game supplies.


Monday, March 30, 2015

Librocubicularist- March 2015

I do a lot of reading and most of that takes place in bed.  When this term started popping up online it really amused me to know there was a specific term for it. So when I decided to do a monthly book roundup post I felt like this would be a fitting title.


Because of all the planning and work for our Pi Day party I actually didn't read as much as usually this month but here are the highlights.


Grisha Trilogy


Ruin and Rising (The Grisha, #3)Ruin and Rising by Leigh Bardugo

My rating: 4 of 5 stars


While driving around on Valentine's Day my husband and I had a long conversation where we both talked about role-playing campaign worlds we are designing. As part of that conversation I asked him about what he thought made something Russian.(As in if you wanted to create a country that had a Russian feel but wasn't actually Russia what would it be like.) Our conclusion was that it all boils down to names. The words that you use to describe things is gives the feeling more than what kind of climate or government a place has or the kind of monsters you choose to inhabit it.

That conclusion is backed up by this series. The names for everything from cities and people to types of architecture, food, and clothing come together to give the Russian feel.The books are set in a country that is split in two by the Shadow Fold, a stretch of land shrouded in constant dark and shadow, inhabited but vicious monsters. The main character is an orphan girl named Alina who learns she possesses a special power that could help eliminate the Fold. The story follow her as she transitions from a girl struggling to understand her own powers to the savior of her people.

The plot revolves around her striving to learn to use and control the power herself and others attempts to gain control of her power for their own ends. There's a spooky magic user who controls shadow and a creepy priest who makes me think of Rasputin.

This series has lots of things I think my husband would love. It sets up an interesting new magic system and has a smart aleck pirate who (view spoiler), a character type he really likes. I enjoyed the series because it was fast paced and easy to read and liked the interplay between magic and technology and the overall atmosphere. I also liked the Russia atmosphere of the books, its not a setting that gets used a lot and was a refreshing change.

Age Recommendations:
These books are billed as young adult novels and I stand by that. If you have a very mature middle school kid it may be okay but they contain some intense kissing against the wall kind of romance scenes and monsters that rip people apart and eat them so use your own judgement there.


Washi Wonderful: Creative Projects & Ideas for Paper TapeWashi Wonderful: Creative Projects & Ideas for Paper Tape by Jenny Doh

My rating: 4 of 5 stars


This book contains great ideas for greeting cards and gift wrapping using washi tape. All of the projects instruction are very straightforward and easy to follow. The projects also use just a few common tools making it very easy to get started. I really love gift wrapping and am eager to put some of these ideas to use. I made one of the decorative flowers in about 5 minutes while watching tv.

Age Recommendation:
Due to the limited tools involved the majority of these projects could be completed by fairly young children. Most projects would be appropriate for later elementary school kids. Some of the cards use collages of tape which even younger kids could help with.


Cookies & Cream: Hundreds of Ways to Make the Perfect Ice Cream SandwichCookies & Cream: Hundreds of Ways to Make the Perfect Ice Cream Sandwich by Tessa Arias

My rating: 4 of 5 stars


My husband loves to make his own ice cream and has been toying with the idea of making his own ice cream sandwiches for a while now so when I came across this book at the library I had to check it out.

It starts out with some basic techniques for ice cream bases and different types of cookies as well as some assembly tips. The rest of the book is recipes. There are about 50 pairings for ice cream sandwiches such as Apple Pie, Lemon-Blueberry, and Black Forest. All of the recipes can also be mixed and matched to create a large variety of other treats. With the weather starting to warm up maybe we'll have a chance to make some soon.

Also this cookbook includes pictures of every ice cream sandwich which is something I really like.

Age Recommendations:
This book would be awesome for anyone of any age. Even little kids can help measure and mix, and who wouldn't want to help make ice cream sandwiches?


View all my reviews

Thursday, March 26, 2015

My First Pocket Scrapbooking Page

I really love the idea of scrapbooking, of having something to look back over the years at all the fun things you've done, or even the current trend of documenting the everyday so you can see how your family and routines have grown and changed. I have piles of photos that go clear back before I was born and lots of scrapbook supplies but somehow no scrapbooks. Not even a single page just waiting for an album to live in. I'm particularly interested in Project Life and other pocket scrapbooking systems like it. (I don't really know what it is but something about all those little cards just appeals to me.) I have downloaded a bunch of freebie cards that you can print yourself and never used them. Sometime last year I even purchased a few physical cards and a pack of pocket pages hoping that if I had everything I needed I'd be more likely to start... but so far nothing.

That all changes right now...

As soon as we got home from our camping trip I uploaded our photos from the camera. Then I got out my pocket pages and started planning...


Unfortunately one of the things that causes me to procrastinate is over planning. After uploading the pictures I browsed through my Pinterest boards for inspiration and to see if I had pinned any free Project Life cards that would be good with these pictures. I sorted through my digital scrapbook files and wondered how they could be used with the pocket pages. I pondered how I could use Photoshop to add journaling information to the photos before I have them printed. Exactly one week later and the only thing I had done was more planning.

So I made a list of all the photos I had and chose a page with enough pockets (plus a few for journaling) and started assigning photos to each space. It took me quite a while to do this. Some pictures looked much better in a horizontal format and others could be cropped to work either way so I ended up playing around with it for a while. At the end of the night I had a list of which pictures I needed to print and what sizes I needed them to be. I uploaded my photos to a website for printing, selecting the options to pick them up at a location near home. I did do just a little bit of Photoshop work. I added a compass and coordinates to a picture of my niece by the river and a caption to the bottom of another.

Weston Bend State Park- River Trail
Then Wednesday I picked up my photos on the way home from work and got started. It only took me about 10 minutes to get the pictures cropped and in place. I used a couple of really cool tools to make it super easy. (Scroll down to the bottom of this post for a list of supplies and tools I used to create these pages.) The first was a 3x4 card punch I used to crop some 4x4 photos and punch out some journaling cards. It was a size that I couldn't find online for printing photos but is used for journaling cards on a regular basis. I had purchased it when I found a good sale hoping that making things easier would get me scraping and after using it I can say that it really does speed things up. It would have taken much longer if I had needed to crop the photos by hand. I also used a pair of Fiskars Corner scissors to round the corners on all of the other photos. It looks like this product is no longer in production but they do have a punch that does the same thing.


After I had all the photos in place I printed out journaling cards for the remaining spaces and cropped them down using the same tools. See a before and after shot below.


After that the only thing left for the camping pages was to write about our trip. The page for Pi Day has a few hidden pull outs so it took a little extra work. I cut a small tab and glued it on the back of the leftover pizza so that you can pull it out from behind the other photo. I also scanned the comments from our guest book and shrunk them down using Photoshop so I could fold it easily and tuck it into the final pocket. Here are the final results I apologize for the glare and bad quality, I will try to get better ones and replace them later. (Update: Added New Photos 3/29/2015)


Products Used: