Showing posts with label home decor. Show all posts

Monday, June 12, 2017

Dining Room Curtains- Finally

After having the fabric in our house for over five years, I have finally finished making curtain panels for our dining room.

There have been many missteps that delayed this particular project. Way back when I first started the project they were intended to be made with only two fabrics, the green print for the main portion and a white bit on the top with tabs. However, I miscalculated and didn't buy enough fabric so I needed to add on to the sides. I eventually went with the pale blue because it was inexpensive and matched our wall color.


Materials:
Main Fabric (green and white) 3 yds
Top Fabric (white) 1.5 yds
Side Fabric (blue) 3 yds
Curtain Clips and rod

Step One: Cut Fabrics to Size ( I used a rotary cutter and mat.)
 The green bird fabric is the easiest to cut, it just needed to be cut in half to make two 54x54 pieces.
Cut the blue in half long ways to make two long strips, 54x22.
Cut the white into 3 equal pieces about 15x 54.

Step Two: Make Header
Sew the white pieces together to create on long strip 15 inches tall by 162 inches long. 

There should be enough leftover to make tabs for the top but after seeing how much easier our living curtains are to open with the rings I decided to use them in the dining room as well.


Step Three: Sew on Side Panels
Sew one blue panel to the right side of a green panel. Sew the remaining blue panel on the left side of the other green panel.


Step Four: Sew Header 
Sew the white header strip across the top of one curtain panel. Cut off the remaining portion and use it for the other panel.


You should have two panels with the blue edges creating an outside border.


Step  Five: Hem all Sides
I used a small hem, maybe 1/2 inch, on the sides and bottom of the panels. I wanted the top to be a bit thicker since it was going in the clips so I made a wider hem, about 1 inch, double folded.

I decided to leave this set of curtains unlined because we don't usually have a problem with the extra light, we just needed something to give us a bit of privacy. Prior to this we just had the mini-blinds that were there when we moved in. We've recently moved a small cat tower near this window and wanted to get rid of the blinds to eliminate chances for them to be tangled in the blind cords.

Now you're ready to hang your curtains! I wanted to use a branch to tie in with the bird on a branch fabric so we save one that seemed about the right size. The plan was to spray paint it either white or silver and use it in place of a curtain rod. Here's a picture of the curtains with the branch before it got painted.


For the most part, it works but there are a few problems. First of all, it has a bit too much of a curve to it because it is hard to get the ends in the brackets without the middle being pressed to close to the wall. It is also a bit too big around at a few points making it impossible for the rings to slide the whole length. So now I'm trying to decide what I want to do with it. 

I have several options:
1. Just give up and buy a curtain rod.
2. Find an entirely new stick that is thinner and straighter.
3. Cut and or sand this stick down in the necessary places until it works.

I lean towards and kind of 1, 3 combo. Buying a super cheap temporary rod to use while I modify our stick.

Gil hung out with me while I was sewing using the table and fabric draped over it as a doggy fort.


Monday, May 8, 2017

Hula Hoop Wreath

Our house has a covered walkway between the main house and the garage that functions kind of like a porch. I have very mixed emotions about it. On the one hand, it's great, no matter how hard it's raining or how windy it may be you have shelter while you try to unlock the door. On the other hand, it keeps light from reaching our front windows so the living room is dark and there's no way to see the door from the street so any decorations, like a wreath, are lost.

So when I started seeing wreaths made using hula hoops I thought, 'Hey, that might be big enough to hang out front and not disappear'.

Supplies:

Hula Hoop
Selection of fake flowers
Wire Cutter
Glue Gun
Ribbon (optional)


The first step is to separate the clusters of flowers using wire cutters to snip the individual stems.


Then lay them out around the hoop until you get a good idea of what you want the finished product to look like. I decided on a somewhat asymmetrical design with just accents of blue flowers.


Once you decide on the design, glue the flowers in place. I started on the outsides and worked towards the middle.


As you work, you will probably end up with bits that stick out, like in the photo below. You can trim these with the wire cutters.


When you get to the center, pay close attention to how the flowers overlap and try to hide the stems and wires under leaves or blossoms.


At this point, if you can wrap the exposed parts of the hoop with a coordinating ribbon. Glue the end and add a bit of glue every few loops until you reach the other end. Or if you like the color of the hoop you used, you can leave it plain. Here are pictures of mine both before and after the ribbon. I'm still not sure which way I prefer.


To hang the wreath....

Supplies:
Sticky Hook
Fishing Line
Stakes for landscaping fabric


I attached the sticky hook to the ceiling of our walkway. In order to protect the flowers, at least somewhat, from wind and rain, I put it about a foot back from the outside edge. Make a loop with the fishing line and attach it to the hook.


Loop the other end through the hoop and decide how high you want it to hang. Tie the end to the hoop. Use two other pieces of fishing line to keep the wreath from spinning. Tie one end of each to the hoop, near the bottom (one on each side) and secure the other end to the landscaping hooks. Push the hooks into the ground under the wreath so it stays facing forward.


Monday, November 14, 2016

String Art-Part Four- Curves and Wings

After months of work, I have finished my gigantic string art project. 
The last stage of the Hylian Crest design was the wings and triforce.

The triforce is created by making parabola curves using the sides of the triangle. Follow the pattern below for each corner, on each of the three triangles.


For the wings, all you have to do is start at the top inside corner and make rays. Inside corner to top outer corner, down one nail, back to the inside corner. Then to the next outside nail, down one, and back. Just keep following that pattern until you get to the inside bottom of the wings.


The final piece is to finish the curved part of the wings. You can use a similar technique to make any curve or even a full circle. You start the string at one end of the curve, then move to the middle nail, over one, then to the second nail of the curve. It's easier to understand if see it then read it, so here is a diagram of the pattern. Basically, you start at one side of the curve and eventually end back at the center of the curve.


For this design, I actually continued a bit after the center to finish the straight side of the wing shape. If you wanted to make a complete circle you follow the same basic pattern. Pick a point to start, move the nail directly opposite and the continue from there.


So without further ado, here is shot of the full, completed design.


This ended up being a much larger project than I expected. Not in size, obviously because I chose that when I started, but in time and materials. I ended up using twice as many nails as I expected and making runs to the store for more thread, both the blue and gold. All together I used 5 skeins of the blue embroidery floss, between a third to a half spool of the silver, and around two and a half spools of the gold thread.

For the most part, everything went according to plan. I had a few issues with loose nails. I know I mentioned in a previous post that I had a much easier time with some nails than others. I don't know if using a different type of board for the backing would have been easier or if I just need more practice with hammering. When I was working on the wings, a couple of the corner nails came loose and caused me to have to redo that section.


To fix it, I put a small amount of glue on the nail, then hammered them back into place. After the glue dried they seemed much more stable.

For now, it is propped up on a bookshelf in our dining room but the plan has always been to hang it behind the couch in the living room. The question now it, what's the best way to hang it, to ensure it doesn't fall and hit our friends in the head. We are considering simply screwing it straight to the wall. I can't think of any type of hooks that seem strong enough to hold the weight of the board.

Sunday, May 29, 2016

Librocubicularist- May 2015

This past week seems like it has gone on forever. It has been raining almost non-stop and there have been thunderstorm warnings, tornado warnings, and flash floods in the area. We have been really stressed out due to water pooling in our yard, near our foundation, making us afraid of flooding, as well as the fact that Gil doesn't like the weather. He doesn't like to go outside when it's raining but at the same time, he doesn't want to be cooped up inside either. On top of all that my husband was working extra long hours due to some issues at work and involved in making arrangments to try and fix some of our financial issues. The past two days have mostly sunny and I've never been so relieved by the weather in my life.


In an effort to distract me from the weather, my Mom and I took a trip to Hobby Lobby and I found out they have some cool DC comics charms and lockets. I'm really broke right now so I can't buy them but I'm trying to think of something really cool I could make. I definitely need a Wonder Woman locket.


Wanderlust Quilts: 10 Modern Projects Inspired by Classic Art & ArchitectureWanderlust Quilts: 10 Modern Projects Inspired by Classic Art & Architecture by Amanda Leins

My rating: 4 of 5 stars


The quilts in this book were not quite what I expected. . . although to be honest I don't really know what I did expect. I checked this out from the library because the idea of quilts inspired by architecture intrigued me. The designs are based on a variety of features from egg and dart molding to patterns in ancient floor mosaics. My favorite quilt is the on inspired by the look of draped fabric on Greek sculptures. It manages to capture that flowy look on a flat quilt which is pretty cool and the resulting quilt has an irregular shape which looks like it would curve just right to tuck over your lap on a chilly afternoon. Because so many of these projects use either irregular shapes or fancy stitching I felt they were above my skill level and I admit I didn't really read much of the instructions so I can't speak to how well-written they may be. Overall, while I won't be making any of these anytime at all soon I still found this book to be interesting and inspiring.


Amy Butler's Style Stitches: 12 Easy Ways to 26 Wonderful BagsAmy Butler's Style Stitches: 12 Easy Ways to 26 Wonderful Bags by Amy Butler

My rating: 2 of 5 stars


While this book has great instructions, most of the bags are just way to big for my taste. Like a 21 by 17-inch handbag big. I actually think a lot of the bags featured in this book are cute I just don't know when I'd use them. The purse I currently use is 5 by 7 and it holds everything I need for every day. I do occasionally use larger tote bags for things like grocery shopping and hauling library books so maybe I could make on to use for that.

Celebritrees: Historic & Famous Trees of the WorldCelebritrees: Historic & Famous Trees of the World by Margi Preus

My rating: 4 of 5 stars


This a fun little book about famous trees around the world including General Sherman in Sequoia National Park and the Tree That Owns Itself. There's a short story about each tree and it's age, then a section at the back with more general information about the types of trees. There's also additional material about conservation and how to learn more about the trees presented in the book. Even though it's intended for kids I really liked this book. I like nature and the outdoors, especially trees and clouds, and the idea of a tree that owns itself is really cool.


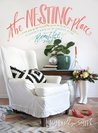
The Nesting Place: It Doesn't Have to Be Perfect to Be BeautifulThe Nesting Place: It Doesn't Have to Be Perfect to Be Beautiful by Myquillyn Smith

My rating: 5 of 5 stars


This book is all about how to love the house you have. It focuses on working with the house you have and a budget you can afford instead of putting things off, waiting for the perfect house, or being frozen with indecision because you are afraid of making the wrong choice. The author covers a variety of topics such as deciding the purpose of your home, learning to take risks, and how to stop your fear of imperfection.
There is a lot of information about changes that are renter friendly as well as money saving. The overall emphasis is on just doing something. If you don't like it you can always try again, it's easy to repaint and redo a lot of projects. It has actually inspired me to get back to work on our house. We have several projects that we've been putting off for a variety of reasons, including simple indecision, which this book addresses very well.
On a final note, I should mention that I found this book in the religion section of my library, not the decorating section. Throughout the book, there is a message of learning to be content with what you have and making the most of what God has given you. Only the final chapter of the book actually focuses on the religious aspects and I felt that it added to the overall effect of the book instead of detracting. However, if you are extremely anti-religion then it's not going to be a good book for you.

On of the things this book has inspired me to is to fix our living room curtains. They actually were perfectly acceptable the way they were except for one thing, they were difficult to open. Due to being located behind our giant sectional sofa they are difficult to pull so we rarely opened them making our dark living room even darker. We thought that adding curtain rings would make things easier but I could never decide what type or color of rings would be best. Last week we had a mark down at work and a bunch of curtain rings were clearanced. So I bought a few pack and put them up and I'm very glad I did. It has made the living room much brighter. Not only do we open the curtains more but they also pull farther to the side so they let in more light than ever. We are also thinking of painting our hallway, something we haven't done in the 6 years we've lived here because I could never decide on a color.


I'm super happy with our changes so far and can't wait to get started making our house more awesome.


Monday, February 22, 2016

Laundry Room Upgrade

So we finally got around to finishing what should have been a very simple home improvement project. Our hallway has a wide closet that is intended to house a side by side washer and dryer. Since we recently purchased a stacked set we have quite a bit of unused space.

It's in a very awkward place to try and get photos of but here are some before pictures.


We also have a small kitchen closet with our water heater. It's also where we keep our trash can to protect it from our cats. Up until now it was also holding the carpet cleaning attachments for our vacuum cleaner and some other stuff. With the addition of shelves its all stored out of the way in the laundry area. We also got rid off that white storage thingy on the side because it wasn't really working. We still need to hang our accessory caddy up but we realized we need wall sinks.

Here are the after pictures.


We repurposed an empty cat litter bucket to hold dryer lint. I also used an empty soda bottle to make a drip guard for our soap dispenser.


I want to paint the shelves so that they are easier to clean just in case they get soap drips or something. The plan is to eventually add a countertop that hides the cat box and gives us a surface to use for pre-treating stains and folding laundry. I'm also thinking of mounting a towel bar to the bottom of one shelf that I can use to temporary store hanging clothes while doing laundry.

I'm also currently reading up on wiring tutorials because I want to change the light. Right now there's a single bulb that is right over the washer so most of it is blocked. I hope to be able to find a way to make some kind of fixture that branches so we can have light on either side of the machines.


Monday, December 14, 2015

Geek Snowflake Roundup

It's the Christmas Season and every year I intend to completely deck our house out with fantastic paper snowflakes. For whatever reason I never seem to get it done. However I've rounded up as many geeky snowflakes as I could find and posted them here. Just in case you needed a little inspiration for your own holiday decorating.

Start here for basic instructions for paper snowflakes Creek Line House.

Movies and TV

Star Wars

This collection from Matters of Grey includes 33 Star War themed flakes.


Anthony Herrera Designs has released a new set of snowflakes every year for the last several years. Each set contains templates for 6-7 designs.


The site also has templates for Guardians of the Galaxy.


Star Trek

Wings on Water posted pictures of several Star Trek snowflakes, unfortunately templates are not included. That being said with the inspiration you should be able to create a templated or design of your own.

There is a template available for this Enterprise snowflake featured on Buzzfeed.


Harry Potter

Harry Potter flakes from Suzy Homeschooler


Jen Draws It on has some snowflakes on her page at deviantart.com. (No Template)


Superheros

Templates for several Superheroes from Comic Book Resource


Superman Snowflake from Flickr


Game of Thrones

Game of Thrones by Kyrstal Higgins


Lord of the Rings

Leaves of Lothlorien by ldhenson (No Template)


Cation Designs has a version of the Evenstar and the symbol of Rohan.


Dr. Who

I personally am not a huge Dr. Who fan but I have lots of friends who are and there are a ton of snowflake design out there for the show. These are just a few a google search will find others.

Oddly Crafting tumblr has several posts including the following:

Who Flakes
Who Flakes 2
Tickld.com shows this elaborate design. (No Template)


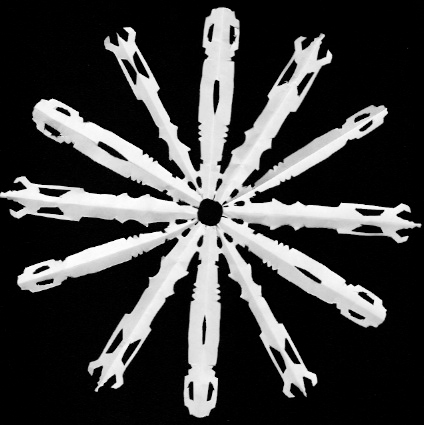
The Anti-Craft also has templates for several designs including this Sonic Screwdriver Flake.


Firefly/ Serenity

My favorite in this entire post is this Firefly snowflake found on Geek with Curves. I would like to see more Firefly based designs out there... Maybe that's something I'll have to work on for next year?

Stargate

From Fool of a Touque

Video Games

Fallout Series

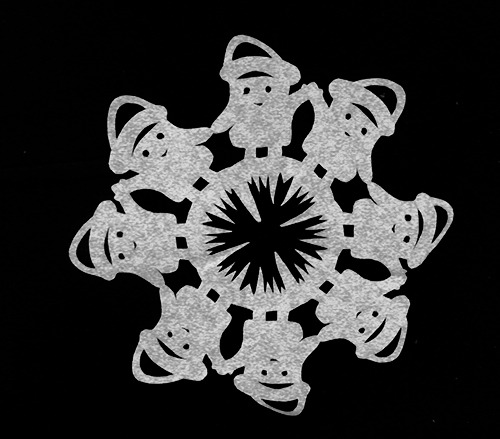
With the recent release of Fallout 4 I had to include this Vault Boy flake by Stacey Herron.


Legend of Zelda

Zelda and Mario by The Nifty Nerd

Hylian Shield design found on Instructables (No Template)


 Zelda Templates found on Pinterest.

Zelda Flake
Zelda Flake 2 

Final Fantasy

Moogle found on imgur. (No Template)


Skyrim

Skyrim design with Template

Skyrim Flakes from Nerdapproved (No Template)

Skyrim (No Template)

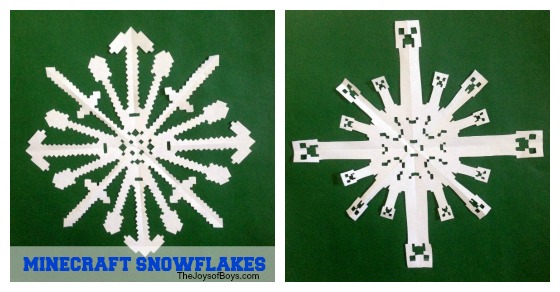
Minecraft

Minecraft by The Joys of Boys


Miscellaneous

Steampunk Gearflake from Tish Tosh Tesh


Download templates for these Lego Snowflakes by Pink Stripey Socks


Nobel Physicists via Geek Art Gallery


And finally this fantastic Transformers snowflake on deviantart.com (No Template)


Hope you enjoyed the designs I found. Please feel free to add links to others you may know of in the comments sections. I'd really like to see some Dungeons and Dragons or other RPG type snowflakes. That's another set that I could work on for later. Dragons or maybe polyhedral dice designs.

Updated 12/20/15 to include Stargate and Gear Snowflakes
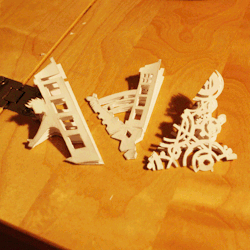
Update 12/23/2015 Wizards of the Coast created snowflake templates! Including one for a gelatinous cube which is hilarious and awesome. You can download them here. Scroll down to see a few I just made.