
We are going to our party as Superboy Conner Kent and Wonder Girl Cassie Sandsmark, shown below.

All I needed to do was make a couple of t-shirts for us to wear with jeans and boots that we already own. I also have a lasso and am planning to make cuffs for Wonder Girl.

Superboy
It was really easy to do the Superboy shirt. You can easily find the logo online to use as a template you just need to leave a few connecting bridges.

Mine was a little difficult because for some reason our printer didn't want to cooperate so I had to fill in some parts.

Transfer the design to freezer paper to use as a stencil and iron it in place. Then just fill it in using red fabric paint. WARNING: It will take a lot of layers of paint to fully cover the black shirt. This photo is after three coats.


Add an extra layer of paint to fill in the connecting points and then you're done.
Wonder Girl
For the Wonder Girl shirt I had to make my own stencil. The first thing I did was try on my shirt and mark the area where I wanted the design to be.

I measured the space and marked the center. Then after that I measured to each side of the center to mark where the side of the W should be. It actually took me several tries to find the right measurements. My first attempt looked more like a Charlie Brown stripe than Wonder Woman W's.

For my final version I adjusted the height and move the bottom points closer to the center.
The shirt is 20 Inches across and I marked the center and 3 inches to each side of center, at 7, 10, and 13 inches. At the tallest point the design is 6 inches high. I made each stripe about 1 inch wide and left a half inch in between. On the outer and center line make a mark at 1 inch, 1.5, and 2.5 inches from the top. Mark the two middle lines at 1, 1.5, and 2.5 inches from the bottom. To finish the design connect all the points.

Then iron on the template and paint it with gold paint.

It's not quite finished because I still need to add the stripes on the arms. I didn't make it part of the template because I wasn't sure where the sleeve would sit when the shirt was actually one. I'll have to have someone help me mark the spot.

I bought about 3 yards of gold cord to use as a lasso but I haven't quite decided how to attach it to my belt yet. I have today off and am going to try to finish the sleeves and make cuff bracelets. I will be sure to post an update when I finish.
Update October 25th


Then I just filled it in the fabric paint, flipped the shirt over, checked that the stencil lined up with the other side and painted that side too.
Wonder Girl Cuffs
To make the cuffs for Wonder Girl I used a couple of empty Pringles cans that I cut down.First carefully cut off the bottom of the can using an exacto knife. Then mark a straight line down the side and cut the can open.

This should let it open enough to fit your hand through. Check how it fits on your arm and decide how long you want the cuff to be.

My arms are small and actually fit inside without needing to cut the side open. I decided to fit the cuffs to my arm where the top lip of the can could close around my arm. I positioned it there and made a note of much extended past my wrist. As you can see from the pictures I did all the fitting with my bare arm and in retrospect I should have tried it with the shirt to be sure everything would fit with the long sleeves. It all turned out alright but its just something to keep in mind.
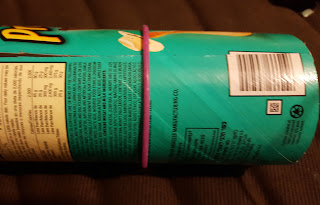
I used an elastic hairband to mark the line so I could the length down easily.


After that I punched a few holes in each edge so that I could add laces to hold them tight to my wrists. Then I added a quick coat of silver spray paint to cover the front side. The logo on the can shows a bit but not as badly as it seems from this picture. I only needed them to last for a few hours so I wasn't overly concerned but you could use multiple coats or start with a coat of primer.

I laced them by pushing the ribbon in through the bottom two holes, up along the inside of the cuffs and out the top two holes. Put them on, pull the laces tight, and tie the ribbon at the top. Unless you're really good at tying one handed you will need someone to tie the end for you.


Here's a few pictures of us before we headed out to the party last night.


No comments:
Post a Comment