Showing posts with label Halloween. Show all posts

Monday, October 31, 2016

Halloween-iversary

This Saturday was our 9th wedding anniversary. Usually, we do something for our anniversary and Halloween separately but this year we decided to combine the two and have a haunted house dinner party. We love playing Betrayal at the House on the Hill and the expansion was released just a few weeks before our anniversary so it was a perfect excuse to buy it for ourselves.

We were limited in the number of people we invited by the number of players for the game. That allowed me to make the invitations more elaborate because I only had to make a few. I decide to make spell books that had been found in the house with the party information on one of the pages.


I downloaded a printable spell book cover and gray pattern for endpapers. I also did a google image search to find pictures to use as spell pages. The center of the book has all of the details about the party and the front cover has a post-it note connecting it to the imaginary house on the hill.


Our dog Gil grabbed one of them off of the table and chewed up a corner, right before we were going to give them out. I didn't have time to get another one made but luckily it kind of worked with the old book idea. (It also didn't hurt that everyone invited has dogs and would be understanding.)


For dinner, we made spooky tentacle pasta with meat sauce, a simple salad, and breadsticks. The spaghetti is dye by using a bit of gel food coloring in the cooking water.


Dessert was turtle brownies and sweet cream ice cream with a delicious blood orange and blackberry sauce that my husband made which turned out a wonderful blood red color.

Our round of Betrayal was great. I headed to the library beforehand to 3D print an organizer for the game pieces. I ended up only having time to print one-half of it but it made everything run a little smoother. It also satisfies that part of me that loves organizing and making rainbows, a nice little rainbow of betrayal.


We ended up being shrunk and trapped in the house with cats trying to eat us. The survivors managed a narrow escape by toy airplane, barely winning the game before being eaten. Wr did lose some people but made it out with barely enough to meet our win conditions


The haunt that we played came from the original game but we enjoyed the new rooms and cards from the Widow's walk expansion. I also liked the addition of the explorer tokens which are used to mark which explorers have taken advantage of 'once per game' room bonuses.


Thursday, October 29, 2015

Celebrating 8 Years Together

My husband I spent this past weekend celebrating our 8th wedding anniversary and it was a perfect mix of activities and lazy nothingness. We both took a couple days off work so we had a four day weekend together. Initially we didn't have anything planned, just the time off but as things got closer we made a rough list of things we wanted to do. Nothing really had a specific day or time that it needed to happen.

First of all we spent most of Saturday running errands and doing a bit of cleaning to get it out of the way so the rest of our time was clear. We did our grocery shopping and picked up a stack of DVDs we had on hold at the library for later plans. One thing that we meant to do but didn't was to buy pumpkins to carve later in the weekend. We specifically had an idea for using a white pumpkin but because we couldn't find any at our grocery store it got dropped of the list. Then that night we attended a Halloween Party hosted in part by my sister-in-law, Bev, where we dressed as Superboy and Wondergirl.


Then we spent all day Sunday reliving our childhood, by staying in our PJs and watching old cartoons. Admittedly a lot of the cartoons we ended up with are more from our teen years but that doesn't really matter, we worked with what the library had. We ate cereal, Honey Nut Cheerios and Boo Berry. For lunch we had dinosaur shaped chicken nuggets with mac and cheese. In the evening we had talked about ordering pizza and calling it a slumber party and getting old movies but never decided what movies would be best. So we just kept watching cartoons and ordered chinese instead of pizza because its something we did a lot while we were dating. We also snacked on pizza rolls and Little Debbie cakes at various points of the day. It was pretty awesome.

Gotta Love the Library
Monday we decide to go out and see The Last Witch Hunter because it seemed interesting and has some connections to DnD but also because it was showing at Cinetopia and I wanted a chance to try the Living Room seating. That ended up not working out for us because they lost power just before we arrived to buy tickets. We went to a later showing at Ward Parkway shopping center but had time to kill before the movie started. Since we ended up wandering around in Target for part of that time we bought another couple of Lego Minifigures and some Star Wars Micromachine blind packs. I hope to be able to use the micromachines in a terrarium like those I linked in the last post.


Tuesday was the actual day of our anniversary and we went down to Union Station to see the Da Vinci exhibit. It was very cool. It talks a bunch about his notebooks and the kind of things he drew and studied, how his studies of birds and flight lead to plans for flying machines and that kind of thing. 


Then it has recreations of a bunch of his inventions alongside the sketches from his notebooks. Most of the machines/ inventions can be touch and tried out but not all. At least for my husband and I some of the ones that sounded like the most fun to try were the ones that said Do Not Touch but that's alright. We seemed to be the only ones really interested in playing with the machines anyways. 


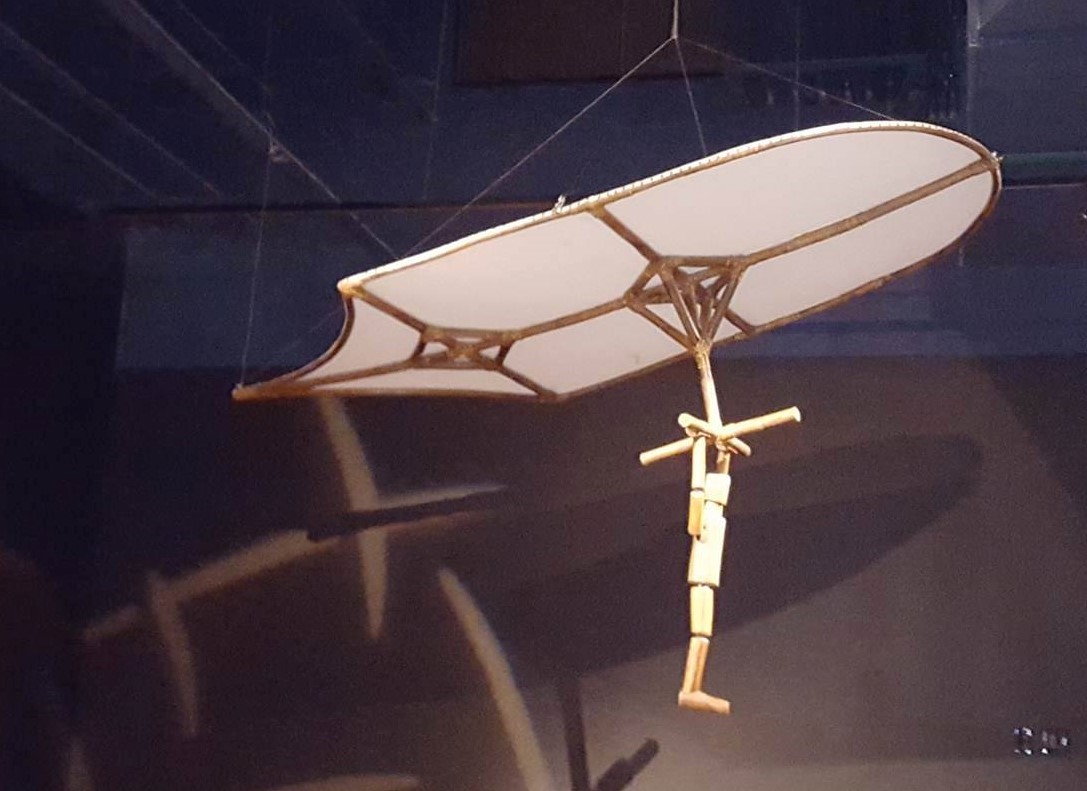
 There is everything from models of his plans for diving suits, to simple pulleys, to crazy war machines like the scythed cart.


We didn't get a picture of this one but they had a small scale replica and a full scale model of a different version.
After that there is section discussing his anatomical studies and how it related to his art. Following that there are reproductions of some of his paintings. Several of them discuss how he used the golden ratio in his work. It was really interesting but they didn't have an explanation of what the golden ratio is until the very end. I already knew a bit about it but if you didn't the pictures of the paintings divided up with red lines to show the ratio or spiral don't really mean much. The final little bit talks about some of his less known interests which included cooking, planning theme parties and weddings, and stage production. For an interesting read you can check out Da Vinci's Kitchen which uses notes for parties and grocery lists from his notebooks along with general cooking history to create recipes that Da Vinci may have eaten.

Overall we had a great time and got an awesome photo of me looking much to excited to be in a Da Vinci tank. It was also fun to look at replicas of things that come up in Assassin's Creed like the pyramid shaped parachutes, and they have a kid's room with blocks to build your own ideal city or flying machine. They have a basic paper gyrocopter plus paper and tape with a sort of wind tunnel where you can try it out. 


The final part of our day was supposed to be a nice dinner out but it turns out that my husband broke a tooth over the weekend and was in too much pain so we had dinner at home. I'm appreciate him hanging in as long as he did although I wish he'd agreed to go to the dentist sooner. He had it pulled Wednesday afternoon and is already feeling much better. And as a side note we had the greatest misty fall weather just perfect as far as we were concerned.

Taken using the Instaweather app

Here's to many more great years and fun times!

Thursday, October 22, 2015

Super Halloween Costumes

My husband is a big fan of the Conner Kent Superboy comics and has been saying for a long time that he wishes he could find a good Superboy shirt that would fit him. I've mentioned that I could make one but for various reasons have never gotten around to it. So when we needed to come up with costumes this year on a low budget and somewhat short notice I knew it was time.

We are going to our party as Superboy Conner Kent and Wonder Girl Cassie Sandsmark, shown below.


All I needed to do was make a couple of t-shirts for us to wear with jeans and boots that we already own. I also have a lasso and am planning to make cuffs for Wonder Girl.


Superboy


It was really easy to do the Superboy shirt. You can easily find the logo online to use as a template you just need to leave a few connecting bridges. 


Mine was a little difficult because for some reason our printer didn't want to cooperate so I had to fill in some parts.


Transfer the design to freezer paper to use as a stencil and iron it in place. Then just fill it in using red fabric paint. WARNING: It will take a lot of layers of paint to fully cover the black shirt. This photo is after three coats.


Add an extra layer of paint to fill in the connecting points and then you're done.

Wonder Girl


For the Wonder Girl shirt I had to make my own stencil. The first thing I did was try on my shirt and mark the area where I wanted the design to be. 


I measured the space and marked the center. Then after that I measured to each side of the center to mark where the side of the W should be. It actually took me several tries to find the right measurements. My first attempt looked more like a Charlie Brown stripe than Wonder Woman W's.


For my final version I adjusted the height and move the bottom points closer to the center. 

The shirt is 20 Inches across and I marked the center and 3 inches to each side of center, at 7, 10, and 13 inches. At the tallest point the design is 6 inches high. I made each stripe about 1 inch wide and left a half inch in between. On the outer and center line make a mark at 1 inch, 1.5, and 2.5 inches from the top. Mark the two middle lines at 1, 1.5, and 2.5 inches from the bottom. To finish the design connect all the points.


Then iron on the template and paint it with gold paint.


It's not quite finished because I still need to add the stripes on the arms. I didn't make it part of the template because I wasn't sure where the sleeve would sit when the shirt was actually one. I'll have to have someone help me mark the spot.


I bought about 3 yards of gold cord to use as a lasso but I haven't quite decided how to attach it to my belt yet. I have today off and am going to try to finish the sleeves and make cuff bracelets. I will be sure to post an update when I finish.

Update October 25th

For the stripes on the sleeves I cut another stencil. I had my Mom help me mark the sleeves for placement and lined the stencil up as closely as possible with those tape marks.


Then I just filled it in the fabric paint, flipped the shirt over, checked that the stencil lined up with the other side and painted that side too.

Wonder Girl Cuffs

To make the cuffs for Wonder Girl I used a couple of empty Pringles cans that I cut down.

First carefully cut off the bottom of the can using an exacto knife. Then mark a straight line down the side and cut the can open.


This should let it open enough to fit your hand through. Check how it fits on your arm and decide how long you want the cuff to be.


My arms are small and actually fit inside without needing to cut the side open. I decided to fit the cuffs to my arm where the top lip of the can could close around my arm. I positioned it there and made a note of much extended past my wrist. As you can see from the pictures I did all the fitting with my bare arm and in retrospect I should have tried it with the shirt to be sure everything would fit with the long sleeves. It all turned out alright but its just something to keep in mind.

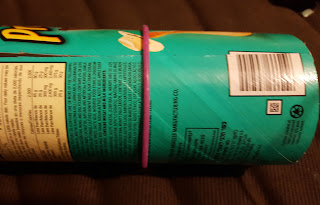
I used an elastic hairband to mark the line so I could the length down easily.


After that test the fit on your arm again. Hold the sides in so that it fits close around your arm and make a mark so you can trim the side down.


After that I punched a few holes in each edge so that I could add laces to hold them tight to my wrists. Then I added a quick coat of silver spray paint to cover the front side. The logo on the can shows a bit but not as badly as it seems from this picture. I only needed them to last for a few hours so I wasn't overly concerned but you could use multiple coats or start with a coat of primer.


I laced them by pushing the ribbon in through the bottom two holes, up along the inside of the cuffs and out the top two holes. Put them on, pull the laces tight, and tie the ribbon at the top. Unless you're really good at tying one handed you will need someone to tie the end for you.


Here's a few pictures of us before we headed out to the party last night.