Thursday, May 21, 2015

Rain Delay

Due to an unexpected power outage yesterday I didn't get finish all the projects I set out to this week.
I'm fairly sure that I can finish everything up in time for lunch today and will update this post with pictures of the finished product.

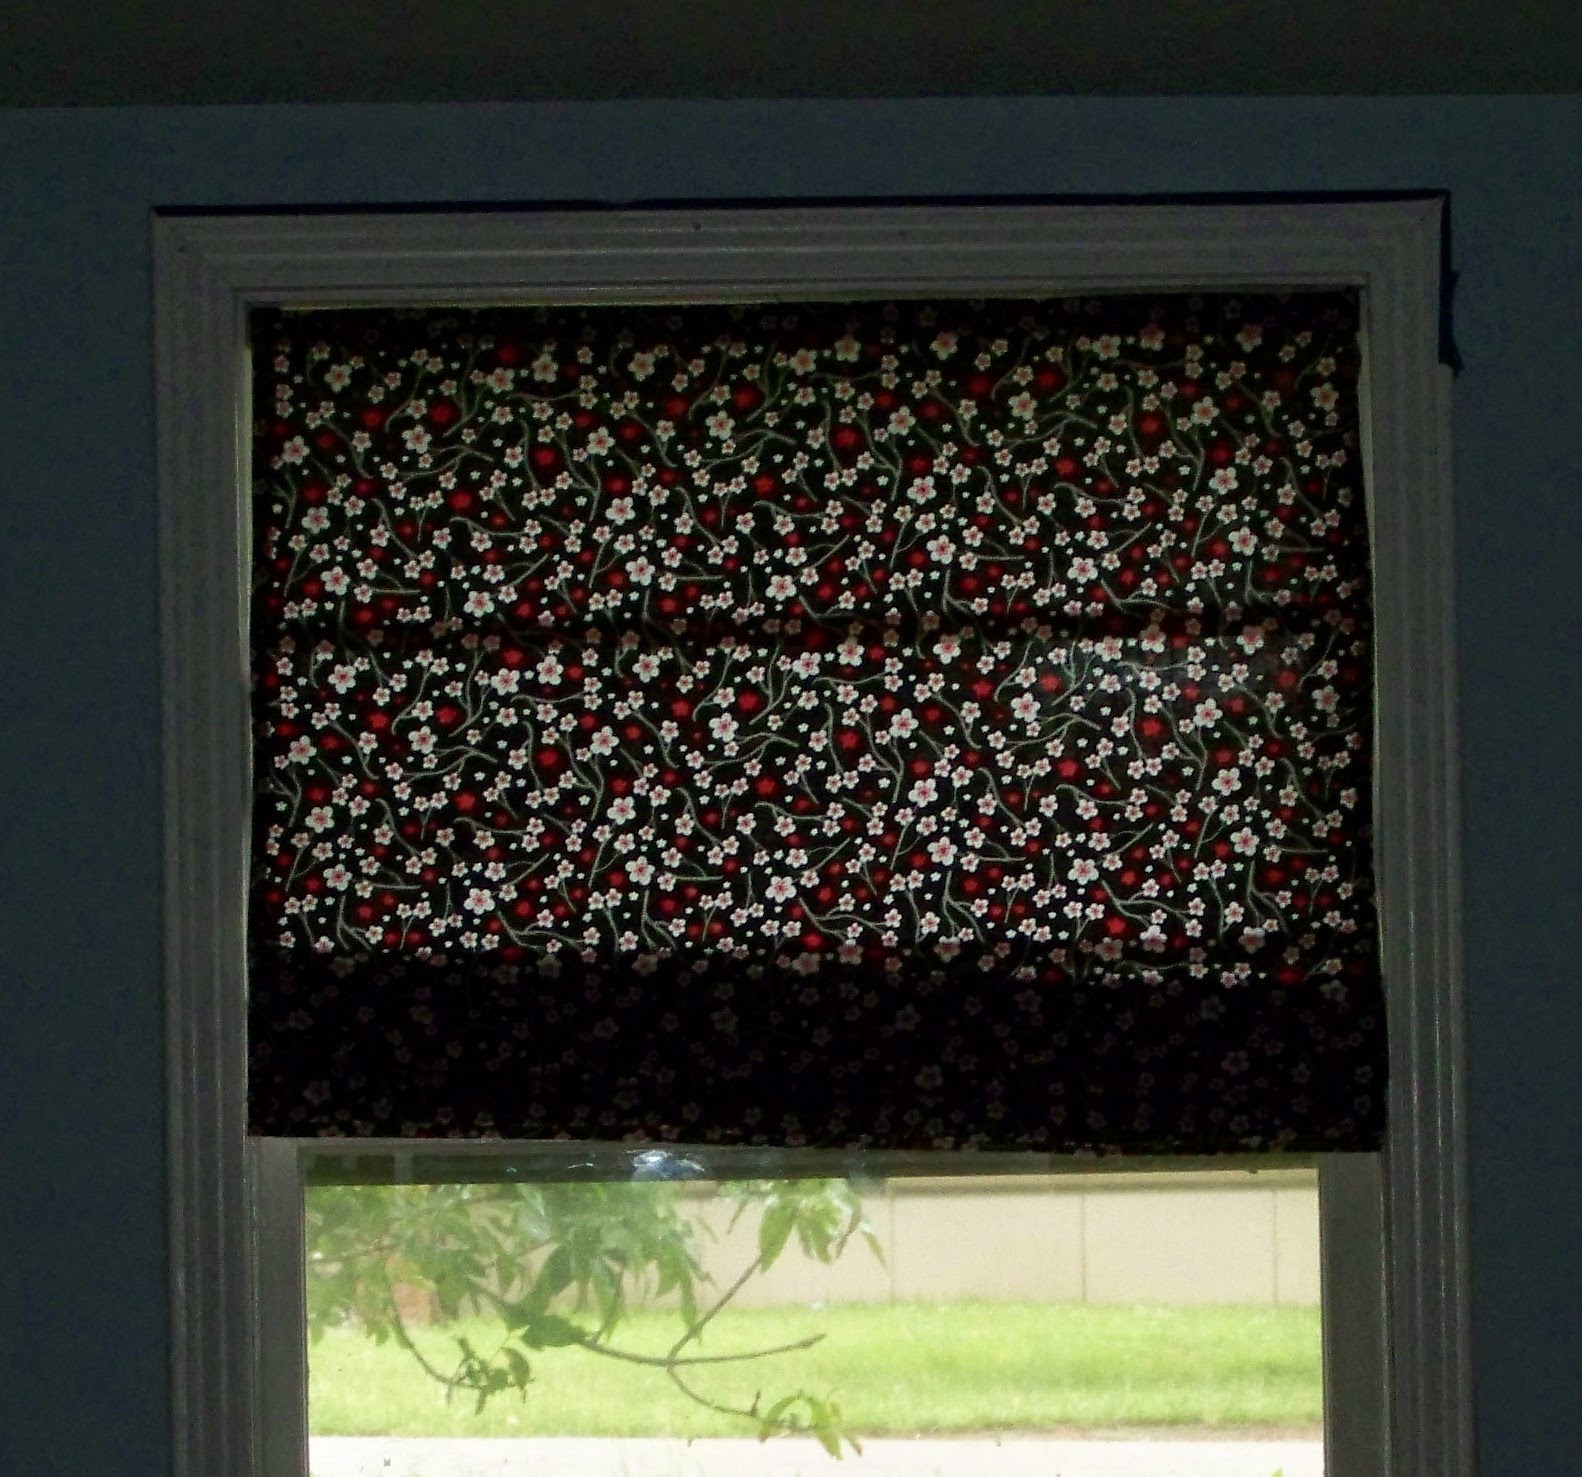
I just seem to have done everything in the wrong order. I spent all day Monday working on the laundry I mentioned and reading in between loads. In the afternoon I washed some dishes and did some work in our back yard. Then on Tuesday I finished up the Roman Shade for our office. I used a tutorial that I found on Domestically Speaking. The instructions there are very easy to follow so I won't waste a lot of time rehashing them here. Basically you take the blinds apart and then glue several slats to the fabric you want to use for the shade.


For this one I spaced the slats about 9 inches apart. We hope that this will keep our cats from tearing things up. The office window has a shelf right under it that our cats like to sit on and look out, while doing this they have bent and broken several slats from the mini-blinds. This should let them look out more easily. The plan for the office has always been to paint in some black branches and add cherry blossoms but we've never gotten around to it. The fabric for the shade will tie into that theme.

Night Time- All Open

Day Time- Partially Open

Night- Fully Closed
My plans for Wednesday were to finish my Ironman sundress but we lost power around 10am and didn't get it back until after 3pm. I took a nice walk in the misty rain and got some good pictures of our rosebush covered in raindrops. I took myself out to lunch because I couldn't cook. I sat by our most sun filled window and read a book. It wasn't necessarily a bad way to spend a day (aside from a bit of stress over waiting to hear from the power company) just not what I had planed.  


I had previously cut fabric for dress straps and once the power came back on I could see well enough to pin them in place. Because I want to be able to wear the dress without needing a strapless bra I needed to be sure the straps be covered those of the dress. To make the straps I started with a piece that was 4x18 inches. I ironed in an inch on both sides and then folded that in half and ironed everything again.


For the ruffled 'sleeve' part I used a piece about 5x10 and cut a curve onto one side. The plan is to put a little bit of gather into the straight side and then insert it into the fold of the strap and sew all along the open side.


                     Sleeve Cut Outs                                                              Sleeves with Hem

Update: May 21 11:45am

To add ruffle to the sleeves set your sewing machine to a longer stitch and sew right along the straight edge of the ruffle. Then pull the thread to create gathers.


I tried to hold it in place and use pins to mark where I wanted the sleeve positioned on the strap. After that tuck it into the open side of the strap and sew everything closed.


Then sew the straps onto the dress. I had previously pinned the straps in place to make sure they covered my bra straps and fit the way I wanted them too. The gathers from the elastic thread hide  the stitches where the strap is sewn on the bodice of the dress.


I think the position of the straps is great but I may want to reposition the ruffles so they are a bit more to the front. I wasn't able to get a good full length picture of me in the finished dress but here are some shots of the sleeves.


Monday, May 18, 2015

An Unproductive Weekend

This weekend has been absolutely the least productive weekend ever. I was hoping to have a quiet, relaxing, if short weekend with my husband. Finish some projects on Friday, get some inspiration from reading and maybe some time outside.

What I actually got was this:

Friday was almost completely unproductive. I felt entirely unmotivated. I've been trying to walk for at least 10 minutes a day and I barely made myself do that. The only other thing I accomplished was to wash a few dishes. I really couldn't understand why I was feeling so unenergetic...

Until I woke up Saturday morning feeling super achy and able to feel the gunk in my sinuses shifting around. I guess since it seems like it's been raining constantly for the past week, and part of what I'm allergic to is mold I shouldn't have been surprised. I ended up calling in to work and spent more than half the day sleeping. I suppose I did get a little reading done in between but it wasn't very relaxing.

Yesterday was better. After all the allergy medication and sleep on Saturday I still slept until after 10am. We had very few errands to run and took a short walk together before lunch. After lunch we had time to relax and I was medicated enough to be fairly comfortable. I took a couple of nice cloud pictures for my collection started after reading The Cloud Collector's Handbook a few weeks ago. (I'll post a review at the end of the month.)

Sunday Clouds


I'm feeling enough better to have renewed hopes for productivity moving forward. Here's a list of what I'd like to get done this week.

1. Laundry- right now we have two baskets of unfolded clean laundry that need taking care of. Luckily not to much dirty laundry.

2. Dishes- It feels like we always need to do dishes and clean up our kitchen. At the moment things are actually close to being clean and it would be a great feeling to knock out the last bit.

3. Finish the mini-blind to roman shade makeover I started in April.

4. Add straps to my Ironman Sundress

5. Work on/ complete a project to display some of our lego mini-figures

Friday 15th

Thursday 14th


Thursday, May 14, 2015

Work In Progress- Gm's Notebook

I've been a little off this week so forgive me if this post gets a bit rambly and confusing.  Also I don't have good pictures related to this post but I've been trying to get more exercise by stopping for a walk on the way home so I'm just going to share some picture I've taken on my walks these past few weeks.


My husband had some unexpected time to prep for his game because the last session was canceled while some players were out of town. Since they only meet every other week this gave him a month between sessions. We have been attempting to take advantage of this time by making him a GMing notebook.

Actually what we ended up with was a notebook for keeping information about his world and a separate calendar/planner for tracking events in game.

 Right now the notebook has 7 tabs all with folders for holding extra papers or pictures he might find inspiring. 

1. History- a place to write about historical events like great battles and the origins of the world

2. Religion- list of the worlds gods, creation myth, and information about how people worship

3. Organization- includes some info about organized religion but also knightly orders, guilds, criminal organizations and so on

4. Nations- different countries and their customs, import/ export information, type of government, etc

5. Maps

6. Magic-  place to keep track of unique magic items created just for his world, maybe some custom spells eventually

7. Campaign- where he'll keep notes about adventures, notes on players and npc's


The planner part if more what he'll use to take notes during game. The plan is to set it up like a regular day planner where it has both a monthly and weekly calendars. The monthly calendar will be for marking uneventful days of travels, keeping track of phases of the moon, and also in game holidays. I've found a nice blank calendar so we can fill in the dates and month names as we go since I don't know if he wants to create new names for the months or not. Each month also has a small space for notes.

The weekly calendar is a two page spread I made using Photoshop with check boxes for marking weather, space to make notes about game events, and a spot to reference other campaign notes.


The idea behind the thing one the left is to make a quick check mark wherever the desired row and column meet. So for example severe rain or no clouds. It needs some kind of grid or maybe actual check boxes because right now it could be hard to tell which column a check was in, especially if you got in a hurry. We also plan to add some lists for naming things on the fly. Male and Female npc names, tavern names, guild names, town names, etc.


Here are some other sites you can check out for additional inspiration in creating a notebook of your own.


Monday, May 11, 2015

Avengers Inspired Sundress

Product Review: Elastic Thread


Part of the reason I started the Eclectic Otter was to give myself motivation to do more crafting and to finish some old projects. This is one of those old projects. After seeing the first Avenger's movie I decided to make a sundress inspired by the Iron Man armor. The fabric I bought was still in the bag with the receipt, dated 5-25-12!

One of the reason that I've put off working on this is that I planned to use elastic thread to sew the bodice of the dress and I didn't really know how that would work. Since I was trying something new I invited my Mom down to sew with me. She's never used elastic thread herself but she has many more years of sewing experience than me and it's always nice to have someone to talk things through with. I also looked at a bunch of tutorials online before hand.

Here's some of the links I checked out:
http://www.sewcakemake.com/2012/01/toolbox-tuesday-elastic-thread.html
http://www.rufflesandstuff.com/2010/02/shirring-tutorial.html
http://www.makeit-loveit.com/2011/11/sewing-tip-shirringsmocking-with-elastic-thread.html

To start with you need a piece of fabric big enough to wrap around yourself plus extra to accommodate the gathering. I started with 2.25 yards and ended up trimming a bit off. That leftover bit is 7 inches but stretches out to 13 so I would say you need about twice as long as your bust measurement. The first step it to sew a small hem in one side of your fabric. After it gets gathered it would be way more difficult.


The elastic thread goes in the bobbin and needs be wound by hand, just be sure not to stretch it as you go. Based on the information I found online things vary a little bit based on what type of sewing machine you have. I use a Husqvarna Iris. Getting the bobbin threaded with the elastic is a little tricky because you need to stretch it while you go. We had some trial and error on this. The first few rows we made didn't seem to gather but I'd read that it would bunch more as you added lines. Eventually we ran out of bobbin thread and after we retreaded there was an immediate difference so we had to figure out what we had done differently. In the photos below you can see what the stitches look like on both the front and back sides of the dress. The top two rows are with the incorrect tension and the center ones are after we figured out the trick.


We found that if we but the bobbin in place and then threaded the machine when we let go of the thread the bobbin would spin a little as the elastic relaxed and unthread. So we left the bobbin out of the case, threaded it, and the dropped the bobbin in. Some machines suggest adjusting the tension but we didn't change ours. The only adjustments we made to the machine was to change the stitch length, longer stitches are better for gathering. Usually I sew with a 2.5 stitch length for this project I increased it to 4.5.


 Make sure you sew with the right side of fabric facing up. If you want you can mark lines on the fabric to follow but we just lined the pressure foot up with the previous row of stitching. Also because of the gathers it really won't show much if the lines aren't perfectly even. You may need to stretch the fabric a bit to make sure it is flat going under the pressure foot. Just keep making rows until you get a shirred section large enough to cover your bust.


Then wrap the fabric around yourself and pin it in place. Adjust it so that it's as tight as you want the finished dress to be.


After that I laid the dress out and trimmed off the excess length. Just make sure the bottom edge is even and mark a straight line across. I wanted this dress to be right at knee length after I added a ruffle so I cut it just above my knees, but you could make it any length. Then trim any excess you have off of the width and sew the side seam together.


To make the ruffle for the bottom you need a length of fabric at least 1.5 times the circumference of the skirt. I wanted to make a really full ruffle so I calculated for twice the length.

 70 inches around base x 2 = 140 Inches
The fabric is 60 inches wide so 140/ 60= 2.333 so I would need a little more than 2 strips of fabric.

Since I knew I wanted it really ruffly I just used 3 whole lengths. I decided that I wanted the ruffle to be about 2 inches long so I cut 3 pieces about 5 inches wide by the whole width of the fabric and sewed them together to make one continuous strip. Iron the seams open to help keep everything relatively flat. Then fold the whole piece in half with the wrong sides of the fabric together.


Divide the loop into quarter and use a pin to mark the edge of each section. Sew around the entire loop on the open side using a extra long stitch setting. When you get to each of the pins lift the presser foot and pull out a bit of extra thread then lower the foot and keep sewing. This will give you an easy place to pull the gathers. With those thread loops it will be easier to work on ruffling the border in sections. The picture below shows one of these loops.


Once you've sewn all the way around pin those same four spots to the sides, center front, and center back of the dress. 

Make sure you are pinning it to the outside of the dress. After I finished sewing my ruffle on I realized it was sewn inside out and had to tear out all the stitches and re-do the whole thing. It was super complicated because I had to watch carefully to be sure I removed the stitches holding it to the dress but not the gathering stitches.


After that pick a thread loop and start pulling. As you pull the thread the fabric will gather. You should be able to sort of push the ruffle along the thread. Keep working from either end until the ruffled section will fit in between the two pins. Add a few extra pins to hold it in place and move on the next section.

Making the Ruffle
One section pinned in place
When you finish you should have an evenly spaced ruffle that lays (relatively) flat against the hem of the dress. Reset the machine to a regular stitch length and sew the ruffle on. Because my ruffle was extra full it was a bit thick at place and needed a little extra help to feed it through the machine but it wasn't too difficult. Then just flip the ruffle down so the seam is on the inside of the dress and its done. 

My plan for this dress actually includes adding straps with a little bit of ruffle, almost like ruffled cap sleeves but because I had to completely redo the ruffle I ran out of time. Hopefully it will let me wear a regular bra and hide the straps as well as support the occasional addition of a small battery powered arc reactor I have that's made to attach to a t-shirt.  I should be able to finish it soon and will post an update when I do.


Overall I found using the elastic thread to be easier than I expected. Once we got the hang of threading the machine it was just like regular sewing. I will add that it took much more than I expected it too. I started out with two spools of Gutermann elastic thread and after we used all of that we switched to Sew-ology brand from Hobby Lobby . Dritz also makes elastic thread very similar to the Sew-ology. I didn't really notice a difference between the brands as far as use goes but the Gutermann is a little thicker. 


Thursday, May 7, 2015

A Mother's Day Journal

With Mother's Day coming up I wanted to take a minute to talk about my Mom. She's amazing and has highly influenced both the person I am now and the creation of this blog. Mom has a degree in Children's Literature and read to us constantly as kids. She was always willing to take us to the library to find the right book and continues to pass on reading suggestions to this day. She did all sorts of crafts and science experiments with us and only kind of got mad when I splatter paint all over my bedroom curtains. When I was in elementary school she would let me grab paint or wallpaper sample to play with...never as many as I wanted but a few. She made the dresses for all the school dances I went to and my wedding dress. She taught me basic sewing when I was younger and has been really helpful answering questions and giving advice as I've started getting into more complicated projects more recently. Earlier this week she spent several hours helping me with a sewing project for Monday's post.


Monday Sneak Peek

Last year for Mother's Day I decided to make a shared journal for my Mom and I. The idea was for me to get to know her a little better, have a place to ask questions about our family history, and also advice about various situations. My original intent was to try to trade at least once a month but sometimes one or the other of us is too busy to write. But in the past year we have each written in it six times so I think that's still good. Our topics jumped around a bit covering things like how my parents met, ideas we have for home remodels, and favorite childhood books. Check the bottom of this post for other ideas about shared family journals and writing prompts and ideas.


 I used composition book I found at Walmart with a brown leather look cover. I had wanted to find a photo of the two of us but had trouble finding one. (Most of our pictures have the whole family, not just us.) I finally settled on using photos with us each as kids with birthday cake. The cover is decorated with scrapbook papers and elements related to sewing and books, hobbies we have in common. The whole thing is covered with clear contact paper to protect it and keep the papers from peeling off.


Family Journal Idea Links:
Lil Journal Project
Dear Daughter Diary- Howdoesshe.com
Family Circle Diary- Shyloh Belnap

Suggestions for Questions and Prompts:
30 Things my Kids Should Know About Me
37 Questions to Ask Your Grandparents
In Depth Personal History- This is me challenge

Monday, May 4, 2015

Geeky Weekend Fun

It has been a really fun weekend for our household, starting with Free Comic Book Day on Saturday, opening of Avenger's: Age of Ultron, and now Star Wars Day. (May the Fourth. . .)

Free Comic Book Day

This is only the second year we've ever been to Free Comic Book Day and we had a great time. I had to work in the afternoon so we had time limit but we actually managed to swing by a couple of locations this year. Our first stop was Pop Culture Comics. It's close to home and they give an extra comic for each food item donated to Harvesters so you can help other and get a stack of books. We arrived shortly after they opened and there was already a line out the door but it moved very quickly. We got in choose our free comics, browsed a bit and made a purchase in around 30 minutes. There were quite a few family with kids there and it was fun to see how excited they were.

Free Comics- Plus Purchased Legend of the Guard Volume 2
Some have different comics on the back side
After that we had some extra time so we stopped at BBop Comics just to see if they had any different titles. We grabbed two more free books and purchased Lady Mechanika which I've looking for since I came acrossed it on Goodreads in 2013 and also a Wonder Woman comic. I was looking for the free Cleopatra in Space and Steampunk Goldilocks but either the were gone before we arrived or neither location had them to begin with, I know titles can vary by location.  Nonetheless we still have an impressive stack of comics to read over the next few day.


Age of Ultron at the Drive-in Movies

While I headed off to work my husband and some friends got together to play Star Wars Imperial Assault. Sunday we got up early to run some errands so the we had the evening free for a trip to the Boulevard drive-in to see Age of Ultron. We love the drive-in and make a point to go at least once every year. (Last year we went 5 times.) It seems like whenever we mention it there are people who didn't realize there were still any drive-ins around so if you've never been to the drive-in here's some reasons you should check it out.

1. The main reason to visit the drive-in is that it's very family friendly. 

Some of the other reasons will expand on this idea but generally its just fun for all ages. You can bring young kids and not have to worry about them crying or talking and disturbing other patrons. We've even seen people who brought the family dog along.


2.  It's cost effective, especially for a family. 

My husband remembers going to the drive-in as a kid because, as one of four at the time its was the only way they could afford to bring the whole family along. Our local movie theater charges $4.40 a person for a Matinee showing and the drive-in is $10 a person for a double feature. So a trip to the drive-in works out to about the same price as two matinees but still at night. If we went to an evening showing at the regular theatre it would cost us $6.40 apiece. Once you start adding in kids the drive-in wins hands down with kids 11 and under free versus $4.40 each at the regular theatre.

Note: This is based on prices for these 2 specific theatres prices in your area may not be the same.

3. You have control of the volume.

My mom constantly holds her fingers in her ears when we go to the regular movies because its to loud at the drive-in you can turn the speaker or radio in your car to whatever volume you want. During Ultron we had the radio up to the point that the floor shook a little if there was an explosion and that was pretty cool. You can even watch with no sound at all and make up your own dialogue. There's a lot of room for personal preference there.

4. You can bring your own food and still get fresh popcorn from concessions.

We have never gone to the drive-in with bringing dinner. For us it's usually a pizza or chinese take-out but any kind of picnic or take-out food would be fair game. There is a no grilling rule at the Boulevard but with a little planning it should be no problem to grab dinner from your favorite barbecue joint on the way over. If you're still hungry or need a drink refill you can go the concession stand for popcorn and other snacks.

Our trip this weekend included pizza and garlic bread, chocolate mini donuts and a bag of candy.


5. You can talk during movie or not.

Half the reason we like drive-in movies is that we can talk about what's happening without disturbing other people. Kids can ask questions without being shushed, babies can cry and you won't be asked to leave. If everyone in the car is like minded you can watch in perfect silence.

6. You can go in your PJs.

While there are some limits based on basic decency the drive-in is very causal. You could dress up for date night or just come in sweatpants. Plus since movies run late you bring the kids in their pjs and be ready for bed as soon as you get home.

7. Added Value from Bonus Activities

This may not be true for all drive-ins but the Boulevard frequently has additional attractions based on the current movies. For example, last summer they had local fire department trucks for Planes: Fire and Rescue and some of the cars from Transformers. The also had a fireworks display before the movies on July 4th.

8. Leg Room

When we go to the movies we back into the space and open up the tailgate. Throw a few cushions in the back and its like being at home stretched on the couch with your feet up. When we have kids we plan to take lawn chairs for us and leave the kids sprawled in the back.


9. You can enjoy the fresh air.

We like being outside and getting fresh air and this is a great way to enjoy the weather on a summer evening.

                      
Weather Before Movies
Weather at Intermission


10. Festive Atmosphere

Going the drive-in is almost like a big neighbourhood party. Before the movies they have a camera up that surveys the crowd and projects it on the screen. You have people dancing to the music, waving at the camera and just hanging out having a good time. Lots of people, my husband included, have a certain nostalgia for the drive-in and you can kind of sense that feeling from the crowd.

To be fair there are a few downsides to the drive-in movie but in my opinion they are small.

1. Dark Scenes can be hard to see.

Sometimes if a scene is particularly dark it can be hard to see details on the drive-in screen. If I had to guess I'd say it has to do with other lights in the area.

2. Weather Factors

The Boulevard is open rain or shine and with our setup most weather isn't an issue, but high winds, heavy rain or other weather factors can be a problem. For one it decreased visibility somewhat and the wind can sometimes cause issues hearing but you can always turn up the volume.

3. Cash Only

This may not be true for all drive-in theatres but the Boulevard is a cash only business. This is barely worth mentioning as downside. Really not a big deal just takes a moment of pre-planning to stop by the atm or get cash back when we stop to grab dinner.

4. Trains

As you can see from my picture up there our drive-in is very close to train tracks. We usually don't have a problem but sometimes an ill-timed train whistle will cause you to miss bits of dialogue.

Drive-in movies are one of our favorite summer activities so if you've never been or even if its just been a while go check it out. They'll still be showing Age of Ultron next weekend and we know you want to see it more than once.

Star Wars Day

The final part of our weekend is today. (I know not technically part of the weekend but Mondays are my day off.) Because our regular Monday night gaming group is between games at the moment we're taking advantage of the timing to celebrate Star Wars day or May the Fourth Be With You by planning some old Star Wars board games from the 80s. Most of these have seen better days but I know they have all the pieces...even if one of them is a homemade replacement spinner.


Have a Great week and May the Fourth Be With You... Watch out tomorrow for the Revenge of the Fifth.