Monday, September 28, 2015

Librocubicularist- September 2015

I'm not sure exactly what I've been doing instead of reading this month but I haven't accomplished much. Part of it is that I've been out crafting and seeing chalk art, part of it is that we're moving into the busy season of work so I've had more hours there. Most of the books that I've finished this month have been comics and I'm mostly okay with that.

I really enjoy superhero movies but have only ever read comic books kind of here and there. So when DC comics started the New 52 series I was kind of excited to have a chance to start at the beginning of the story and be able to actually follow an entire storyline. Unfortunately it didn't really work out that way. There is no way I can afford to subscribe to the entire series so my reading was based on availability from the library. I started out with the Justice League because I was familiar with that, Flash, Aquaman, Superman, and Wonder Woman. Wonder Woman is one of my favorite characters and I thought that it'd be interesting to see how all of the stories tied together. I really enjoyed the beginnings of all the stories. The interactions between members of the Justice League as they started to connect with each other were great. Unfortunately it quickly got to the point where I felt like I was missing out on stuff. I tried to read one the Supergirl comics and had no clue what was happening because half of the story took place in other comics. I enjoyed both the Justice League and Aquaman but the stories actually overlapped almost too much, to the point where reading Aquaman felt pointless. One the other side of thing, I knew from things I read online that Wonder Woman and Superman were a couple but there was absolutely no mention of that anywhere in the Wonder Woman comics. In fact there's no indication that she's a part of the Justice League either. Anyways here's some of the things I finished this month.


The Flash, Vol. 6: Out of Time


I've continued to read the Flash because, for the most part, the story has been self-contained. They deal with the more serious issues of Barry trying to find his mother's killer but still manages to keep an overall lighthearted tone. I like all the crazy villains. This volume was interesting because he ends up fighting himself from the future but I have to admit that I felt a little lost. Most of the story line with the Crime Syndicate takes place in the Justice League books and I ended up reading them out of order. I hope that moving forward it stays mostly able to stand alone.


Superman/Wonder Woman, Vol. 1: Power CoupleSuperman/Wonder Woman, Vol. 1: Power Couple by Charles Soule

My rating: 3 of 5 stars


Since the Wonder Woman series never even mentions Superman and the Superman comic I read only vaguely related to their relationship I decided to give this series a try. I read the first two collections both this month. They were okay. For the most part I enjoyed the story and I think they make an okay couple but it seems kind of choppy and the various plots don't fit together well. I also had a hard time figuring out where the events fit into the bigger story.


The End of Night: Searching for Natural Darkness in an Age of Artificial LightThe End of Night: Searching for Natural Darkness in an Age of Artificial Light by Paul Bogard

My rating: 5 of 5 stars


The End of Night offers a discussion of what will be lost if light pollution continues to increase. The author visits some of the darkest places around the world both to see what truly dark night can be and to better understand what is helping to keep those places dark. It includes a discussion of health problems created in people who work the night shift and never experience darkness as well as the fallacies of equating more light with greater safety. It also discusses the emotional and cultural losses that we would suffer if we lose sight of the night sky and its stars. The idea that all cultures have some kind of mythology based on the stars what happens to our connections to the past and each other if we lose those stars.

Overall it's one of the most interesting non-fiction books that I've ever read and as someone who loves night a very important book as well. One of the main points is that the increase in artificial light at night has occurred so gradually that most people don't even notice that the stars are disappearing. This book doesn't advocate for the elimination of all nighttime lighting just finding a better approach, one that helps to reduce wasted light and minimizes the effect of light on animals and the environment.

Attempting to view last night's lunar eclipse really brought home how much light is really in our neighborhood at night without it really having any purpose. Our particular street is way brighter than it needs to be and you can only the stars immediately above us, none at all down near the horizon. Even at midnight our street is no darker than dusk.


Brave New Quilts: 12 Projects Inspired by 20th-Century Art from Art Nouveau to Punk & PopBrave New Quilts: 12 Projects Inspired by 20th-Century Art from Art Nouveau to Punk & Pop by Kathreen Ricketson

My rating: 4 of 5 stars


This book makes me want to dig out my old art history notes and start planning out quilts...
It starts with a brief discussion of design principles and how they can translate to quilts. After that the author details her process for designing quilts from inspiration to research to finished product.

The main section of the book contains instructions for quilts based on various art movements. Each project contains information on the art movement that inspired it, materials, cutting instructions, details for quilt assembly and finishing, plus an explanation of the color palette chosen and ways to alter the design to make it your own. There are 12 designs (3 designs based on each of the four design elements line, color, motif, and use of text) representing various art movements including Abstract Expressionism, Art Deco, Dada, and Pop Art. I personally would be more interested in different art styles but that's the inspiring part for me. The books gives the idea of translating an art movements ideas into a fabric design and some basic tools to work with and then encourages you to run in your own direction with it.

The projects also cover a range of quilting techniques so that, overall, you get a good bit of quilting knowledge as well. It includes basics of paper piecing, foundation piecing, machine applique, crazy quilting and improvised sewing.

The final chapters give tips for machine quilting, caring for your quilts, and a page of references for quilt inspiration and reading on the history of quilting and designs.

Recommendations: This would be a great book for anyone interested in various art styles or someone who's just looking for a new style of quilting. The designs are rated from easy to advanced so there are projects for a variety of skill levels, although creating your own design could be more difficult.



Thursday, September 24, 2015

Things I learned from a week alone

Let me start by saying that this has been a strange week. I have been having trouble all week remembering what day it is and so totally forgot to write a post last night. I started the week with an evening shift, something that normally only happens on Saturdays and it threw everything off.  So anyways for today's SUPER late post I thought I'd share this list I made while my husband was out town. It's a top ten of funny things that I learned/ realized while he was gone.

Top Ten Things I Learned From a Week Alone


10. I really don't miss having TV. 

(We quit paying for cable a while back and then slowly lost even local channels because they went digital and our TV doesn't have a digital tuner.) While we usually turn on Netflix this week I actually turned everything off and got more crafting and reading done than I have for a while. On the other side, I am sad to missing all the premieres for things like Agents of Shield but I mostly don't mind waiting to see them on Netflix.

9. I head to bed sooner on my own.

I found that I went to bed about an hour sooner without my husband around. I still turned out the lights at the same time but that extra bit of quiet reading in bed helped me get to sleep right away instead of laying around in the dark. Normally I stay up to 'spend time' with him but mostly we aren't actually doing anything.


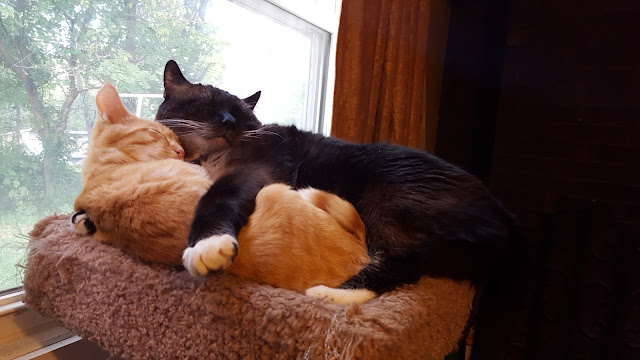
8. Our cat think breakfast time is 7:30.

I knew they like to eat early but since my husband usually can't sleep in he feeds them and I never realized how consistent they are. They woke me up every morning at almost exactly 7:30 and wouldn't leave me alone until they got food.


7. We feed our cats too much.

This isn't really a surprise to anyone, but this week brought it into focus. We have a measuring scoop in the cat food and all week I gave them just one scoop. Normally they have some leftover bits but this week they cleared every little bit. I think we've been giving them heaping scoops and it's helped keep them all chunky. Hopefully now that we are aware of it we can help the cats slim down.

6.  I'm terrible at eating leftovers.

It's hard to cook single portions of some foods so obviously I had leftovers this past week. The plan was for me to use them for lunch during the week. I ate leftover once. My husband on the other hand uses leftovers to make other new awesome lunches for me all the time. He deserves a raise!

Clouds on my way to work last Tuesday


5. My husband makes sure I eat my vegetables.

Bear makes sure we have vegetables every night with our dinner but I only specifically thought to add vegetables to two of the six dinners I ate. I had vegetables in more but admit it was mostly by accident.

4. We should clean the fridge out more often.

I admit that I was a little bit bored on Wednesday night and decided to clean out the fridge before taking out the trash.  Let's just say it was long overdue and we should try to do it on a more regular basis.

3. All of our laundry belongs to him.

We almost always an overflowing laundry basket. This last week we washed everything before my husband left so he had clean stuff to pack and at the end of the week everything was still mostly empty. Part of this is the fact that Bear usually wears two shirts, a button up shirt with a t-shirt underneath, and part because I tend to wear the same clothes a lot.

Clouds from my drive home Thursday

2. It only takes one night for me to revert to taking up the whole bed.

We have a queen bed and don't feel like we need to upgrade but we both admit that we took up more than our fair share of the bed while we were apart. I also like to use his pillow to prop up books and read when he isn't there.

1. I have no idea where our cat litter scoop is.

I planned to scoop all of our litter boxes before trash day but realized that I couldn't find the scoop anywhere. This is another thing that Bear does which I really appreciate but can sometimes take for granted. Three cats is a lot of scooping and he makes sure I never have to worry about it.

So I'll try to keep better track of my schedule for future posts. The end of the month is coming up and that means book reviews. I need to go shopping for one last thing for my Erza hair bow and should be working on stitching for the geeky critter quilt.

Monday, September 21, 2015

DIY Natsu Bow

I'm super happy to have my husband home from his business trip to Canada. We really haven't had much time to relax and spend time together though. His flight got in late Friday and I had to work on Saturday, so we had lunch before I left and dinner together at the end of the day but not a lot else. Then yesterday we spent a sizable portion of the day running errands and in the evening I finished up my second Fairy Tail cosplay bow. (If you missed the first one, based on Lucy Heartfilia, check it out here.)

This one is based on Natsu Dragneel, who has Fire Dragon magic.


Supplies:

Small Barrette
Fire Fabric- 9 inch by 3 inch
White Fabric- 6 by 2 inch, and a 2 by 3 inch
Matching Thread
Shrink Plastic
Red Marker/ pencil
Small hole punch or awl

Step One: Cut and Sew Fabric

Cut the fabric to the sizes listed above. Fold the two larger pieces in half widthwise. (So you have a 4.5x3 and a 3x2) Sew the edges, leaving a small opening, and turn right side out. Sew the openings closed and iron flat. Sew the 2x3 in half and turn so you have a 1x3 inch tube. Iron that flat with the seam hidden on the back.

Step Two: Add Decorative Stitching 

Add lines of black stitching on the white pieces to mimic the pattern of Natsu's scarf.


Step Three: Make a Fairy Tail Guild Symbol

Use a piece of shrink plastic to make a small Fairy Tail logo in red. The shrink plastic I have ends up about half the size so I started with a piece around 2 inches square so it ended up approximately 1 inch. Be sure to add a least 2 small holes before you shrink it so that you can sew it on like a button.

Before Shrinking

After Shrinking

Step Four: Sew Logo to Center Piece

Sew the logo onto the center of the 1 by 3 inch white strip.


Step 5: Assemble Bow

Layer everything with the larger, fire piece on the bottom and white on top. Wrap the center strip around and sew closed.


Step 6: Attach to Barrette


I'm really happy with the way it turned out although I almost put a picture of Happy, Natsu's cat, in the center. In the end I decided that the guild logo would coordinate better colorwise. I also played around with the idea of adding something to reference his pink hair but didn't come up with a solution that I liked.

Thursday, September 17, 2015

Cosplay Hair Bow

Recently I've been seeing a bunch of hair bows based on characters from movies or comic books such as those pictured below from Hot Topic.
Right now I have plans for a series of 3 based on characters from the anime Fairy Tail. The first one is based on one of the main characters Lucy Heartfilia, who is a Celestial Wizard, meaning she uses gate keys to summon spirits for help. Below is a picture for reference.


Supplies:

Fabric or ribbon- I used fabric, about a quarter yard each of white and blue. (If you use ribbon probably about 1.5 yd of white and 1 of blue)
Matching thread
Barrette Clip
Split Ring or large jump ring
Key Charms (The hard part is to find something small enough to not be super heavy but large enough to not disappear into your hair when you wear it.)

Step 1: Cut fabric and sew into strips like ribbon. 

For the white I cut a piece 44 inches long by 3, then sewed the end and one side. Use the open end to turn the strip inside out then sew the other end closed. I pushed my scissors in the sewn end and gathered the whole strip up until I could pull it out of the un-sewn end. Then ironed the whole thing flat and smooth again.


For the blue I used 3 separate pieces. The main bow is 6 inches by 5 inches, the tail 9 by 2 inches, and a center piece 3 by 2. For the main bow and tail fold in half and sew 3 sides leaving an opening on one side to turn everything inside out. I also cut the ends of the tail into a point but that's optional. For the center fold in half and sew one side then turn inside out.


Step 2: Create White Bow

Use the white strip to make the base of the bow. Fold it into 3 loops, hiding the ends on the bottom side. Then stitch over the center to hold it in place.


Step 3: Layer the Various Pieces

You should have these parts- white bow, blue bow, tail, center and charms.


 Start by folding the tail in half, place it under the blue bow and hand sew the two parts together. I added a bit of a pleat as well.


Then layer that on top of the white bow and tack that together as well.


Step 4: Add Key Charms

Slide the key charms onto the ring and thread the center of the bow through the ring.


Step 5: Finish Bow

Wrap the center piece around the middle of the bow and hand sew it together on the back. 


I admit that my hand sewing is not very pretty but it will hold together and that the important part. No one will see the back once you're wearing it. At this point you should have a completely finished bow ready to put on your choice of barrette.


Step 7: Sew onto barrette

Sew the whole thing onto the barrette. I used regular sewing thread but I would recommend using a thin wire. I have some very thin jewelry wire that I was going to use but it wouldn't fit in the needle I have. But over time the metal edge of the barrette will cut through regular thread and the jewelry wire would be more durable for the long term. 

Again my sewing isn't great but at least I'm trying, right?


It is pretty tricky to get a picture of the back of your own head but this one turned out pretty well. Let me know what you think and stay turned for bows based on Natsu and Erza Scarlet.


Monday, September 14, 2015

Chalk and Walk 2015

Before my husband's trip was moved we had planned to go out to the Chalk and Walk Festival at Crown Center this weekend. However I had to work during most of it on Saturday and we were also finishing up some last minute errands before he left. I decided that even though he left super early Sunday morning I would still go check it out. It's the first time I've been although it is the eighth year for the festival. It was a beautiful day and I'm glad I took the opportunity to get out and enjoy it.


I don't know if they give the artist a theme or not but based on what I saw I would guess that they do. There were too many video/ board game themed drawings to be a coincidence. My favorite was this Dungeons and Dragons Rulebook Cover. You can see the book being used as a reference next to the guy in the top left corner.


There were several Legend of Zelda themed pieces.


There were a variety of other video games represented including Spyro, Portal, Mario Brothers, and Metroid. Also a variety of board games, including this large Candyland piece which had a special set up to make it look 3D from the right perspective.


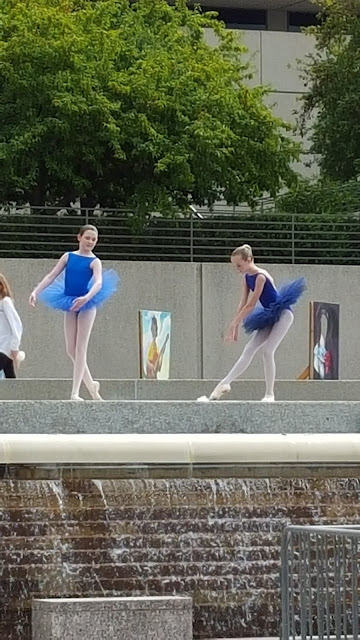
I also had a fun time getting photos of the fountains and dancers performing throughout the festival.


I wish I had been able to go back later in the day and see the finished versions of everything but I just didn't have time. Among other things I had to do this weeks grocery shopping on my own. Its going to be a really strange week without Bear around. The cats already miss him and have been a bit demanding of snuggles all day long. You can see more pictures on my Facebook page.


Thursday, September 10, 2015

DIY Hidden Passport Pocket

I mentioned earlier this week that I was making a passport pocket for my husband's upcoming trip and here are details of how I created it. I want to start this post by saying that I am not very good with zippers but it seemed like the most secure option. I also did the whole thing while my husband was at work so I couldn't check the fit or function of the whole thing until after it was done.

Materials:
Fabric: Two pieces at least 4x6
Belting to make belt loops: about 9 inches
small zipper: I used a 6 inch

Before I started I had to do a little quick math to decide how big I wanted the pocket to be. The passport itself is 3.5 by 5 inches but I wanted it to hang down a bit so everything doesn't get scrunched when he sits. I ended cutting 5.5 by 10.5 so it will be 5 by 10 after .25 inch seams.

The first step is to cut a whole for the zipper. On the pocket I made the zipper runs parallel to your leg but it would work just as well the other way depending on the size. I place the zipper about an inch and a half from the side and down from the top. Mark a line where you want the zipper to be and cut a slit with a tiny v at each end. It should look like the line below.

 >----------------------<
After you cut it open fold and iron the sides back so the zipper fits in the space.


Pin the zipper in place and carefully sew around the outside. This is a little tricky because you have to work around the zipper pull. Also think about which way you want it to open. I put the tab at the top of the pocket when the zipper is closed. It's also a good idea to double stitch the ends to help it stand up to wear when unzipping.


After you have the zipper in put the right sides together and pin everything in place. Also cut the belting in two pieces, fold them in half, and pin those in place as well. They should actually be inside the other pieces with just the end showing. I sewed mine in the wrong way on the first try.


Make sure that you have the zipper open so you can turn everything right side out, and sew around the entire edge of the pocket. I also went over the part where the tab attach multiple times for reinforcement. This is something you definitely don't want coming apart. I included the reminder to open the zipper first because I didn't think about it and had to carefully hold the tab through the fabric and ease it open. It wasn't really difficult to open, but it was awkward so double check it before you sew.

After you turn everything right side out you are done! 


To wear it the loops slip on your belt, just like belt loops, then the whole thing flips over the waist band so its inside your pants. He has tried it on and says it feels like it fits right and won't get squashed. He also plans to store his receipts inside so he can be reimbursed, hopefully it's easy enough to access. We'll have to wait and see.